
We haven’t done a full, updated tour of the house since we started, so as we’re just past the two year mark, we thought it would be a good time to share our progress, all in one place. And besides, who doesn’t like a good before-and-after? This post will focus mainly on the house- we’ll do another on the barn at a later time.
The house when purchased:


The house as it stands now:


As you can see, a lot of trees and vegetation was either removed or relocated somewhere else on the property. This is because most everything was overgrown and either rubbing on the house, diseased or rotting, at full maturity and beginning decline, or too close to the house and unhealthy, and susceptible to ice storms or winds. As far as the house exterior, we’ve re-shingled the back side of the roof, removed the old rotted siding, insulated, sealed, and applied new siding, weatherstripped and reglazed the windows, built (from period lumber) and installed new storm doors on the front and side doors, installed new trim boards, milled and installed new window sills where necessary, and installed new exterior lights. We capped the chimneys, installed gutters and French drains around the house, and re-graded the yard to drain properly. We also replaced the front sill and sealed up the cut granite foundation. The house is completely sealed up and weather tight now, and should easily last the rest of our lives and more.
Stepping into the front entry hall, this is what it used to look like:
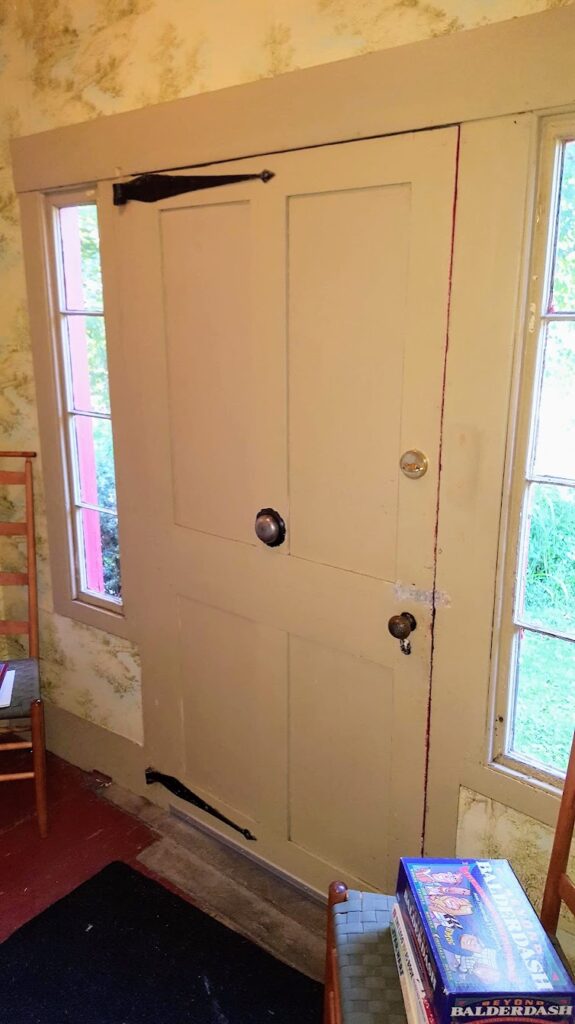
The door didn’t open far enough for a person to enter, as the granite foundation below had, at some point, been removed and replaced with a single course of brick, allowing the sill beam and floor to tilt up, blocking the door. We fixed all those structural issues, stripped and hand-sanded the many-layers-of-paint from the floorboards, then applied a few coats of boiled linseed oil, topped by two coats of matte urethane. We also stripped the wallpaper, painted the ceiling, applied new wallpaper, painted the trim, and swapped out the old light fixture for a glass shade that once belonged to Jenny’s great-aunt Georgia.
Now it looks like this:


Off one side of the entry hall is the parlor, but not much has changed other than wall paint. The plaster has failed on the exterior walls in this room, so at some point we’ll have to address that, but we’ve got bigger fish. The interior wall (behind the door in the first pic below) still features the original stenciling (c1840) of Moses Eaton Jr- the house’s third owner.


Here’s what it looks like now. Our plan is to strip the floors, replace the plaster on the exterior walls, stabilize Moses’ stenciled panel, and restore the doors’ thumblatch handles, which were likely made by Daniel’s hand, but were stripped and sold off by a prior owner. We’ll also remove the old fireplace insert, line the chimney, and install a parlor stove in the firebox.

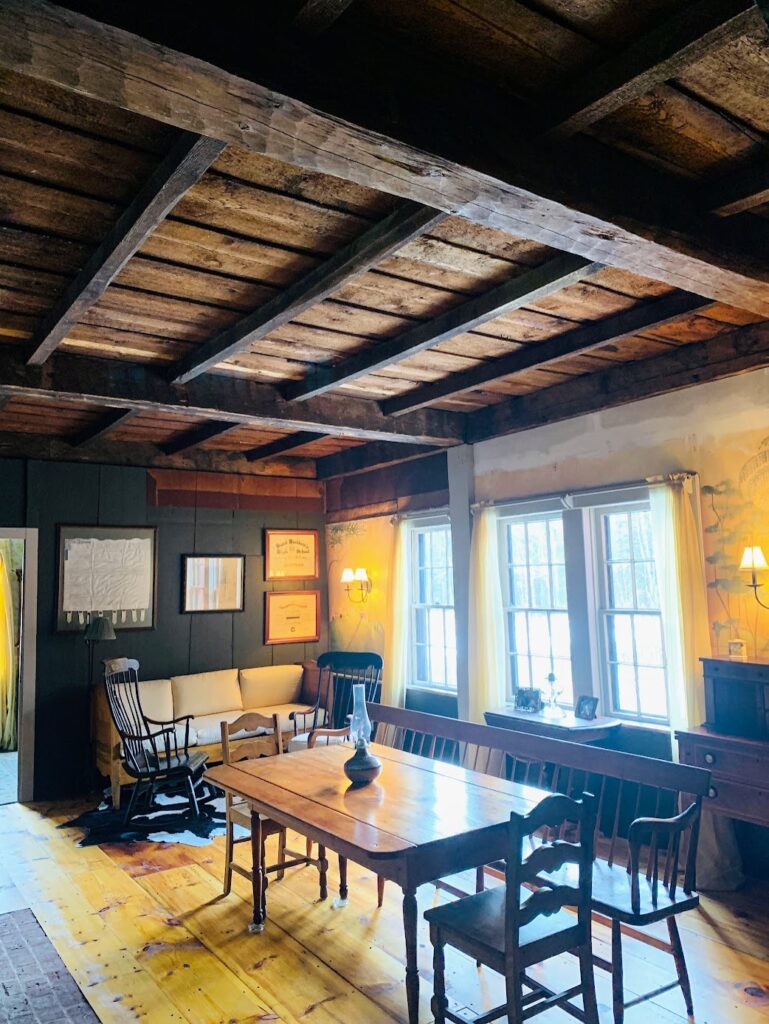
Moving through the parlor, you come into the hearth room. This room was a total restoration top to bottom.


As soon as we closed, we had the cooking hearth restored, using hand-made water struck bricks like the originals. The old ones were on a failing base, and most had spalled or cracked.

After the hearth was restored, we installed a period fireplace crane to fit the existing pintles (which we was gifted by one of our structural contractors- thanks Joel!). We took down the old dropped ceiling to reveal the original beams and floorboard dusters, then we took up the old floorboards (not original, too-far-worn, and patched), repaired the rotted and broken floor joist beams, shimmed and leveled the new subfloor, then topped with salvaged period floorboards attached with reproduction rose-head nails. Once all that was complete, we painted the walls. We also moved the wiring that used to be in the ceiling, and added wall sconces on the wall opposite the fireplace. The murals seen on the back wall are c.2005, and were damaged, so we will be covering those with a more appropriate mural, in the style of Jonathan Poor, nephew of Moses’ muralist friend Rufus Porter, once all the structural work is complete. There is still some work to do covering gaps in the upper wall that used to be above the drop ceiling. While taking out the drop ceiling, we found one of our most valued treasures so far- an outline of a nine-foot-tall cupboard that Abigail had in this room! We preserved the outline, and someday, maybe we’ll reproduce the cupboard as best we can using the profile.

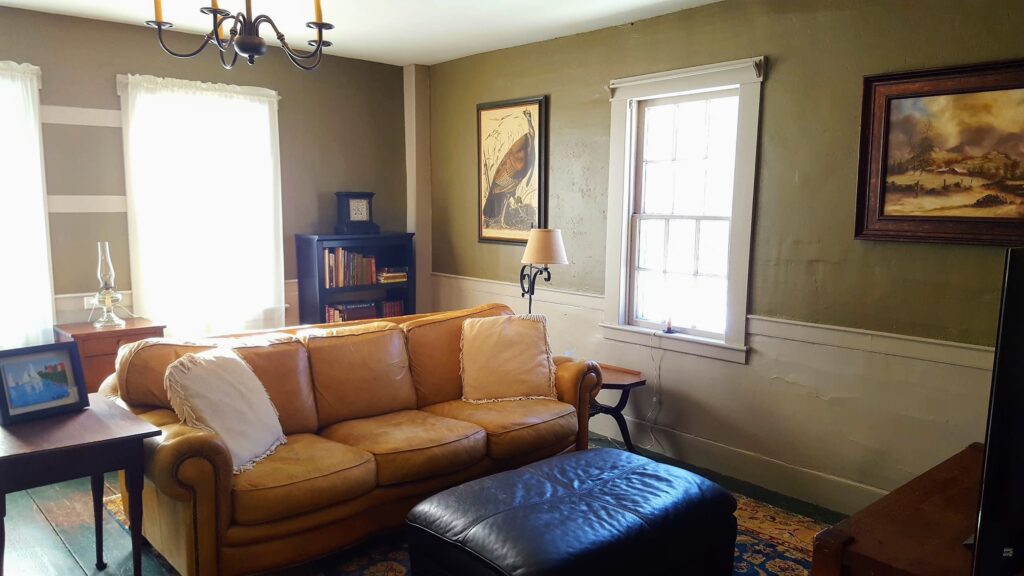
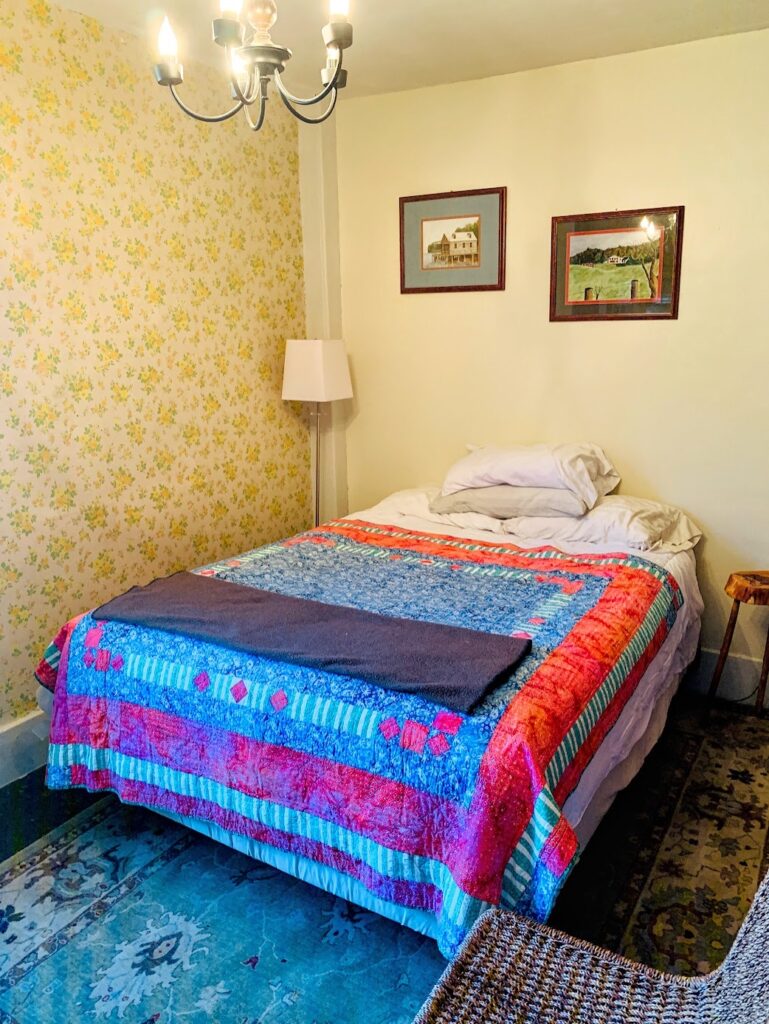
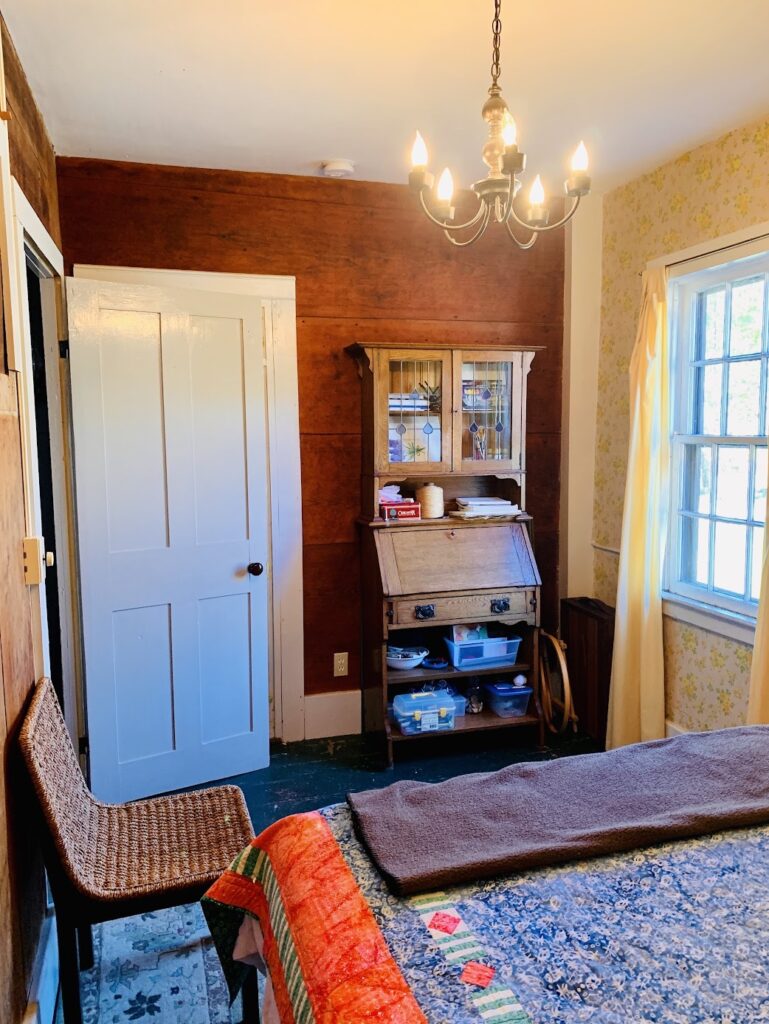
Moving around the corner, we come to our bedroom, which was the more formal parlor. The restoration of this room is later in the plan, so it’s only seen paint so far.
Before:


After:

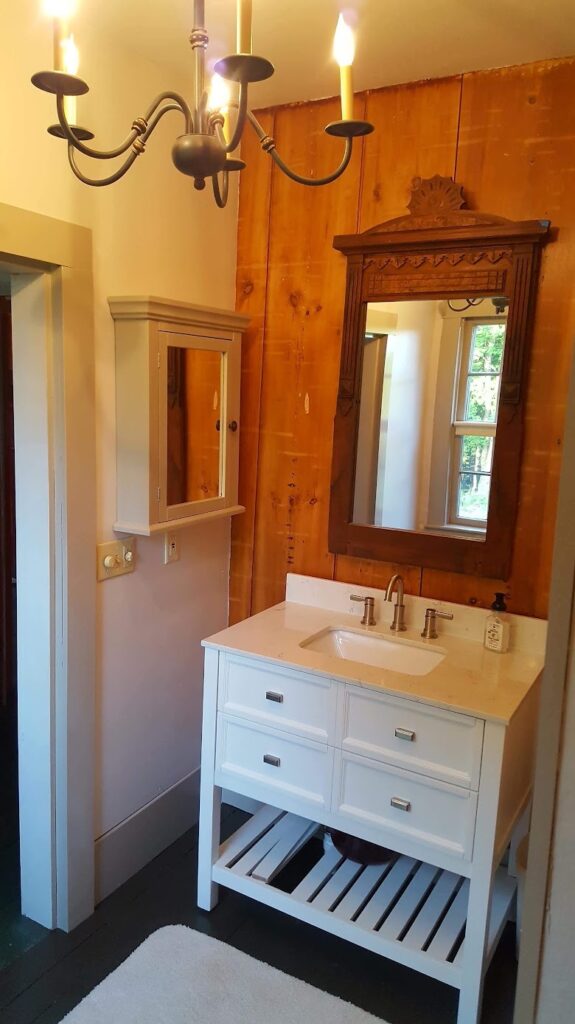
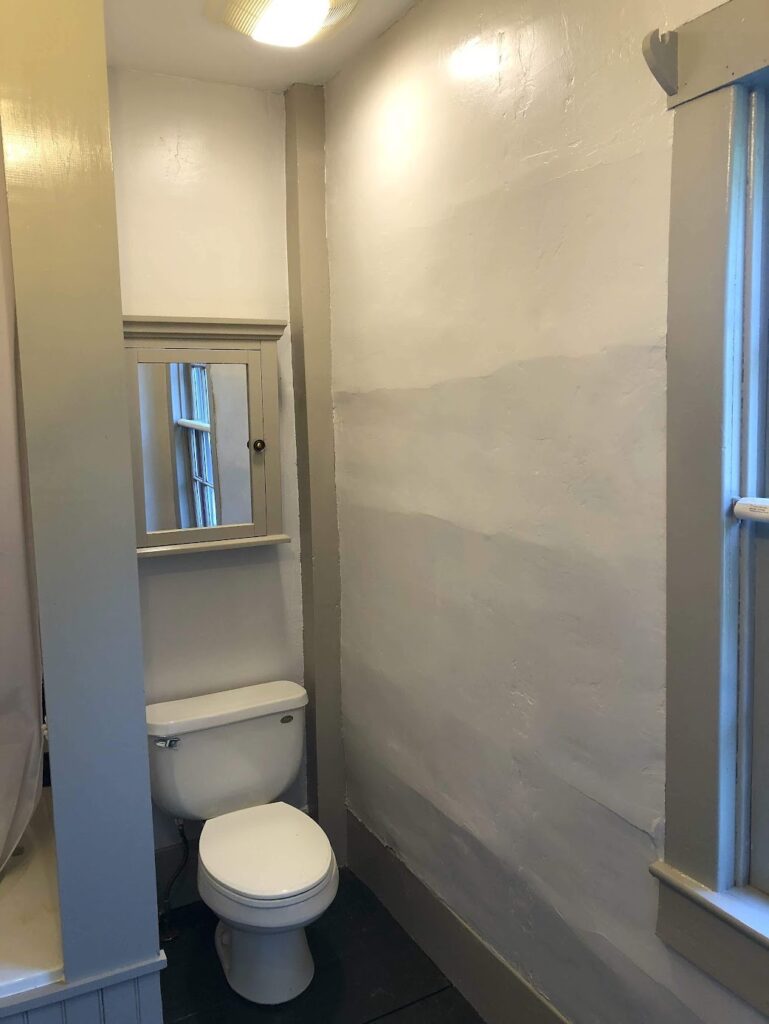
Back out towards the hearth room, and you’ll come to the hall to the side door, as well as our bathroom.


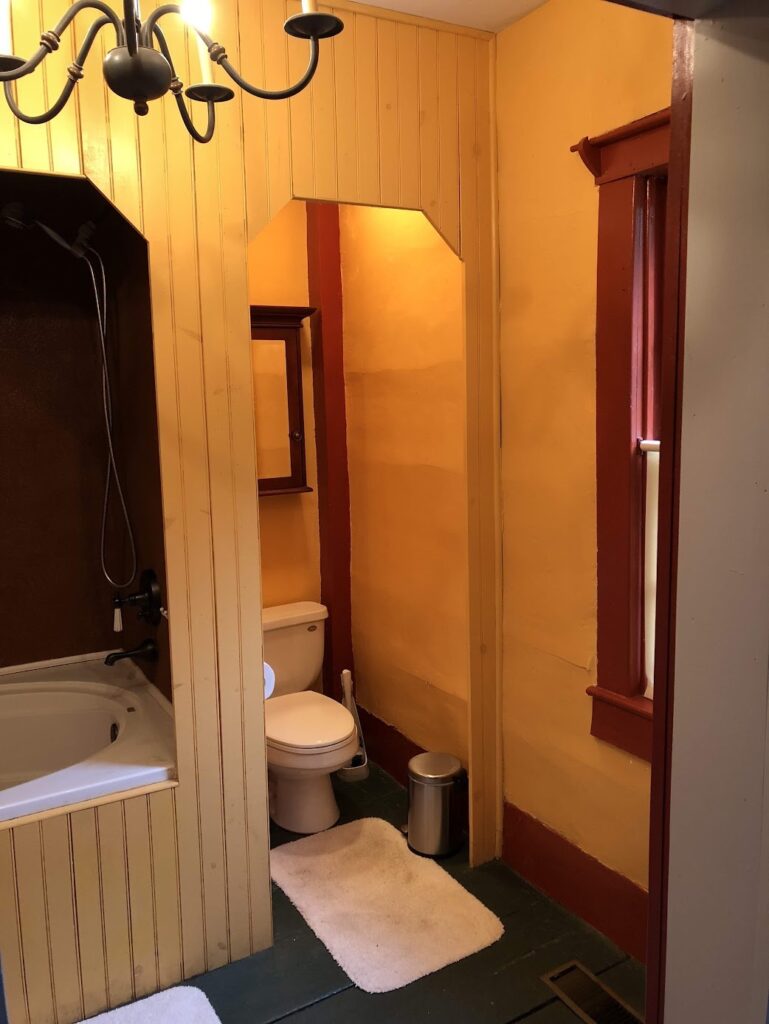
We repainted the hall, did some repair on the side door, then built and installed a new plank storm door. For the bathroom, we removed the tub and toilet surround, stripped the paint from the interior panel wall behind the vanity, installed a new vanity and base, and painted the rest. At some point we’ll take out the tub/surround and build a walk-in shower, but for now the tub doubles as our utility sink during the restoration. As you can see, the plaster needs some work as well.

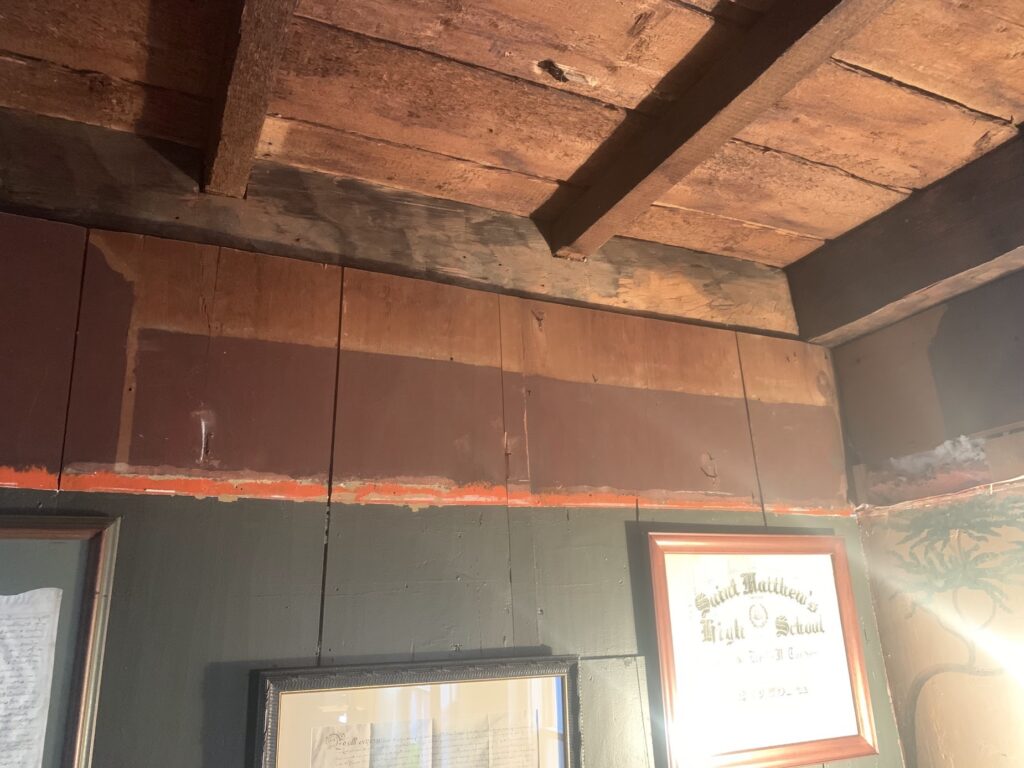
On the other side of the hearth room, opposite the bathroom, is the “borning room”, or a small bedroom off the hearth where a new mother would sleep with her baby.

We stripped the seven layers (as near as we could tell) of wallpaper from the end wall, did some plaster repair and painted, then we cleaned and linseed oiled the opposing panel wall (which had never been painted thankfully), and set it up as a guest room. At some point, we’ll strip the wallpaper from the window wall, strip the paint from the floors, and clean up the panel wall adjoining the hearth room.
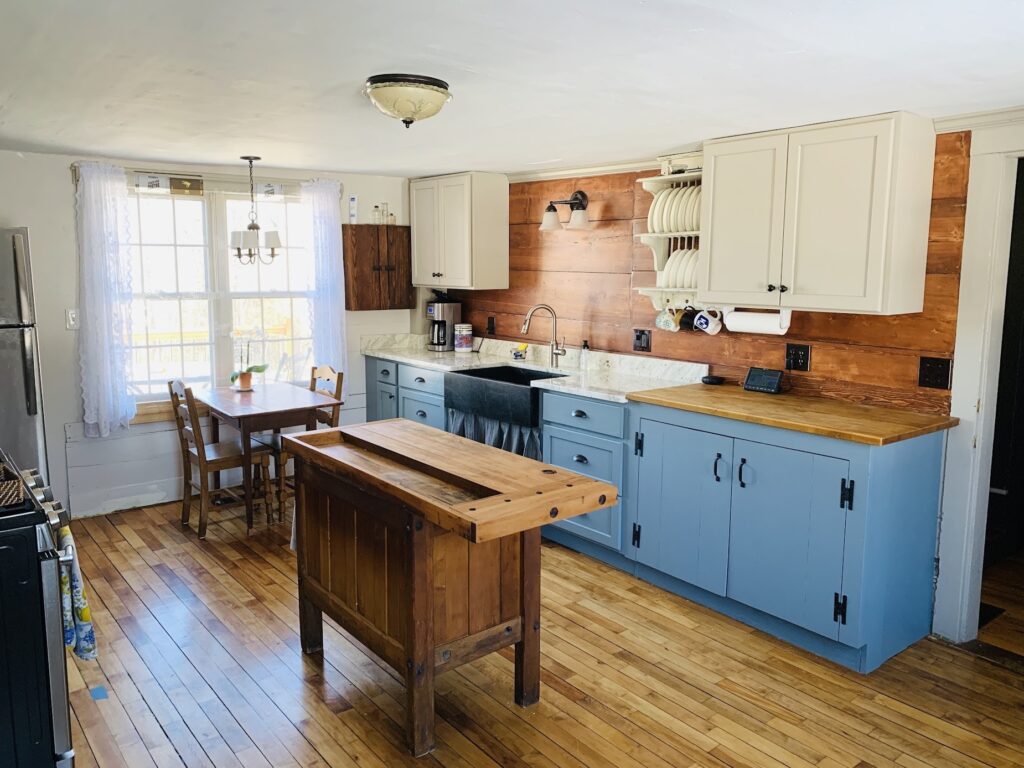
While that wraps up the house, we’ll add our kitchen into this post, as while that’s actually within the ell structure, it is open to the hearth room, and we consider it part of the house. The kitchen is where the original summer kitchen was, and the wall behind our stove contains what is left of the original summer hearth. It was converted to a chimney for a wood stove at some point- likely the early 20th century when the ell structure was added. The summer kitchen would have been a simple lean-to structure off the back of the house, and the lower level would have led outside to the yard. The lower level appears to have been a root cellar, and just beyond is the original dug well.

This room was a complete renovation as well. We first demo’d everything, moved the sink plumbing to the wall to the right, opening up the window overlooking the backyard. We refinished the floors, stripped the panel wall above the new sink, installed new base cabinets and countertops, plus a soapstone farmer’s sink. We also installed new upper cabinets on the sink wall, as well as an antique plate rack. We found an antique workbench that we’ve repurposed into an island, and we’re currently using a c.1740 tavern table as our kitchen table. We’re not sure this is a permanent situation, as we’ll soon be exchanging our modern gas stove for a new wood cookstove, and moving the island to the opposite side of the kitchen from the back window, where an old propane heat stove is being taken out. Our (too small) pantry is currently in the back mudroom, along with our laundry, but we will likely open up the wall into the ell workshop to expand the back mudroom into a larger pantry, and kitchen extension. We also swapped out the ceiling fixture for an antique glass shade from Jenny’s great aunt Georgia, and added new fixtures over the kitchen table and sink.


And this brings us to the screen porch- one of the first rooms we finished (we wanted a place to escape the chaos of the restoration), and one of our favorite spaces. While the screen porch was here, it was unfinished.

We installed shiplap paneling on the interior walls, a ceiling fan, and a board and batten-style ceiling. We ended up having to remove the stairs that led from just outside the screen porch (the door to the left of the pic above leads to an attached deck) to the ground, as they were installed without any flashing, causing both the stairs and adjoining wall to rot. We also installed new clapboards on the outside, rebuilt a couple of the windows, and painted overall. We also replaced the deck railing, and will be replacing the decking, as well as some of the support structure under the deck next year.


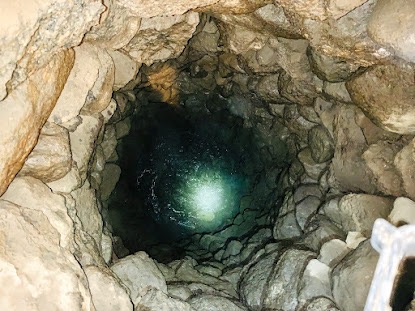
That’s the full tour (minus our daughter’s space upstairs) of the livable area of the house. We’ve also done so much work in the basement, and around areas that you can’t see, but make the house much more livable. We’ve also restored some historical features. One thing we did a while back, after it’s discovery, was to open and restore the original hand-dug well. This was initially a pile of rocks in the ell basement, but after Jenny noticed a reflection under the rocks, we discovered the 14 foot deep well.

Once uncovered, we drained the water, cleaned out the old timbers that had fallen in, then installed an overflow pipe that leads to the barn drainage system. At some point, we’ll level off and mortar up the stones above ground, and build a cover and pulley system. We’d also really like to have this well feed into the potting shed area at the back of the barn.

We’ve also done a lot of work to the HVAC system. Being a timber frame home, humidity is pretty important, and because we’re heating with wood or having cooking fires in the hearth, it gets pretty dry. We installed a steam humidifier system which can put up to 18 gallons of water per hour into the air. We also replaced the entire duct system to better balance the system, making sure all rooms are getting heat/cooling equally. The new ductwork is also much less noisy and intrusive than it used to be.
There were also many, many little every day things we’ve done to make the house more functional, comfortable, safe, or secure. Not to mention, keeping up with the ordinary day-to-day maintenance of an antique historical house. We’ve really enjoyed this process, and are surprised at how fulfilling and healing this project has been for us. We’ve learned so much- both of early American life, and Daniel and Abigail’s history. We’ve got a few more things on our pre-winter to-do list, but once finished, we look forward to hunkering down and just enjoying living here. Eating from our pantry, heating with the cordwood we’ve stored up, reading the stacks of books (mostly historical) we’ve accumulated. We’ll also be doing more research into Daniel and Abigail’s lives before they built this home. The Holy Grail would be to find a signature, or a portrait (we understand this is a long shot, but c’mon, you have to dream). There are also a couple hundred miles of hiking trails just outside our front door waiting to be hiked.
While it appears we’ve done so much (we have), there is still so much to do, so stay tuned. Our next post will be a dump of historical information we’ve found on Daniel so far, so you have that to look forward to. Thanks for following along, and as always, feel free to share, comment, ask questions, or just say hi. If you haven’t already, click the subscribe button, so you are notified when we post.
Be well, and God bless!
Leave a Reply