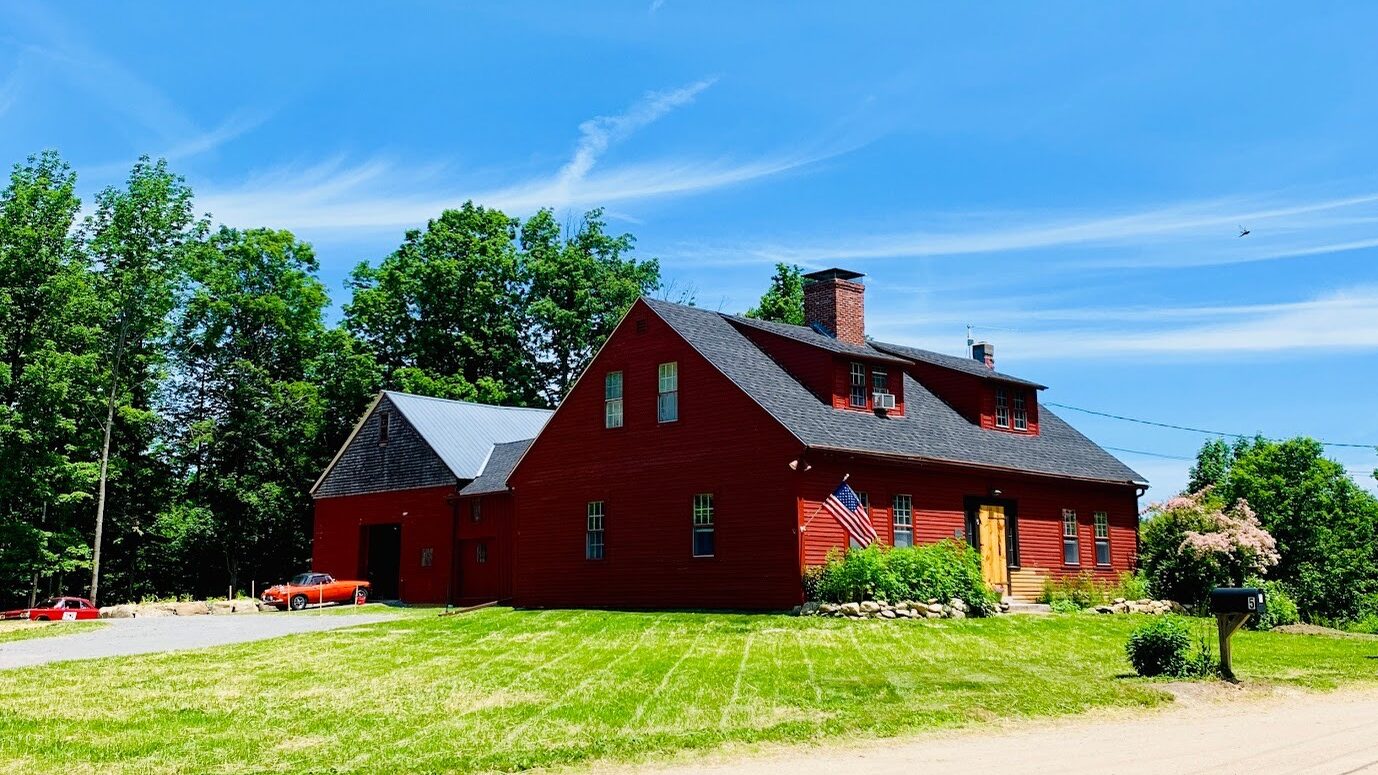
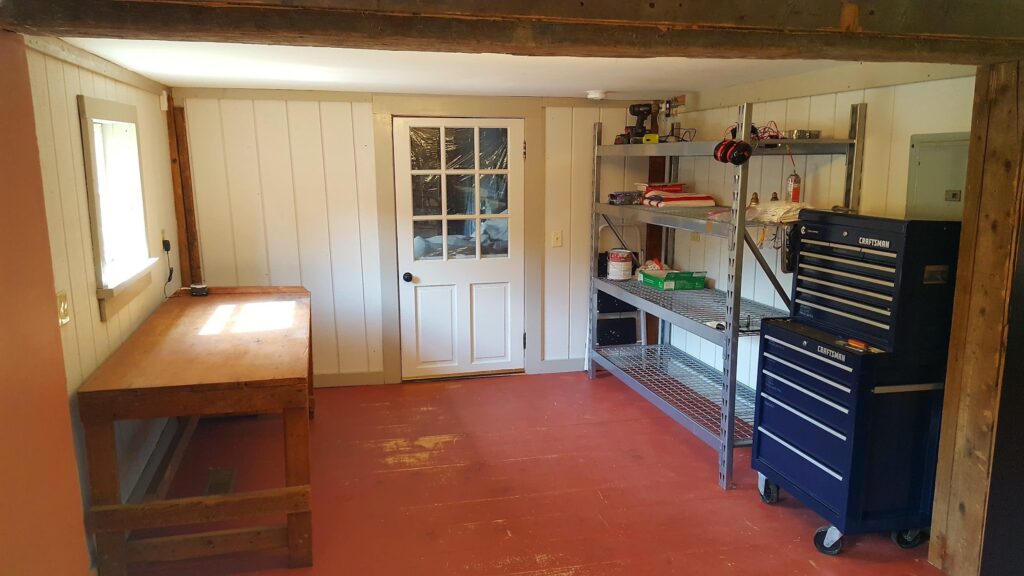
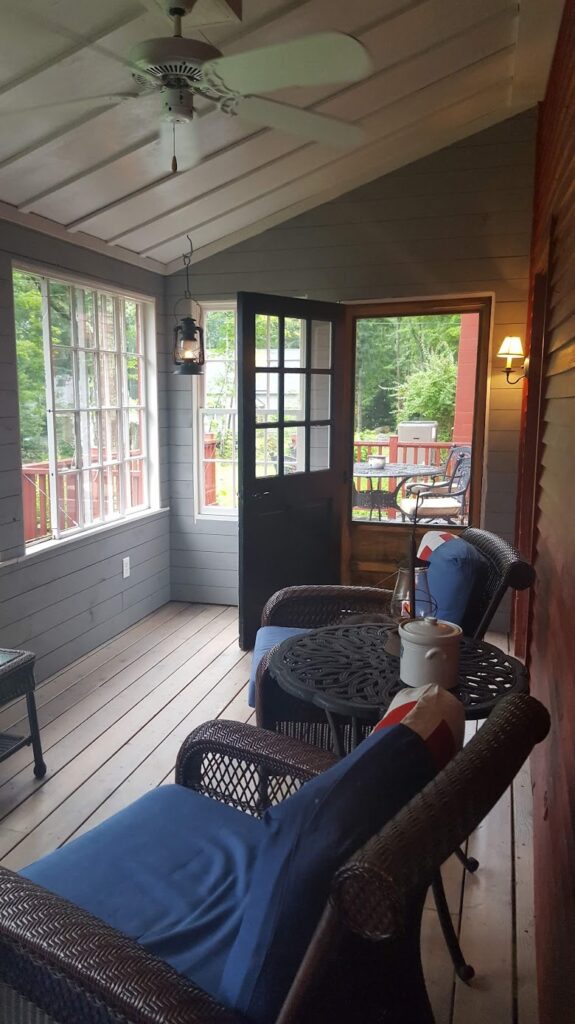
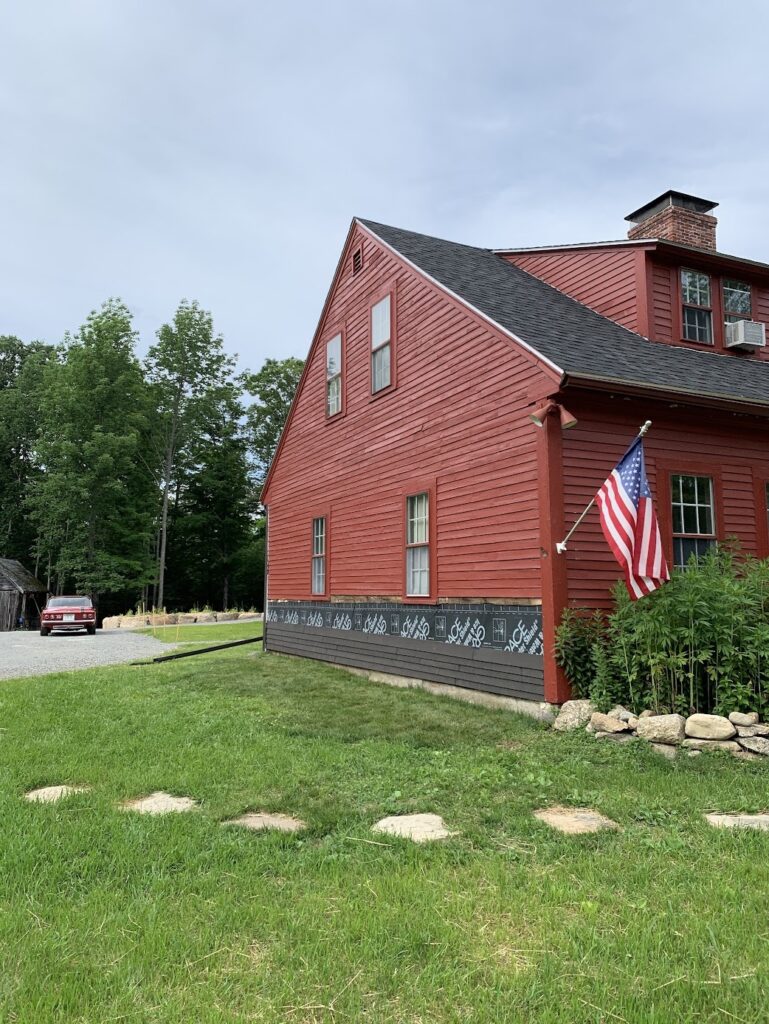
Since you last stopped by the farm, we’ve celebrated our one year “reno-versary”. It’s hard to even remember what it was like when our little caravan arrived after our 40+ hour cross-country adventure, but we do remember being so excited to begin restoring and loving this house. We dug in right away- unpacking, cleaning, sorting, and setting up a work area in the ell workshop. One of the other things we took care of right away was the finishing of the screen porch, so that we’d have a place to escape and relax. Since then, we’ve touched pretty much every surface in this house and barn. It’s really starting to look as it would have when Daniel and Abigail finished up the original building back in 1790- except with plumbing, electricity, and climate control 🙂

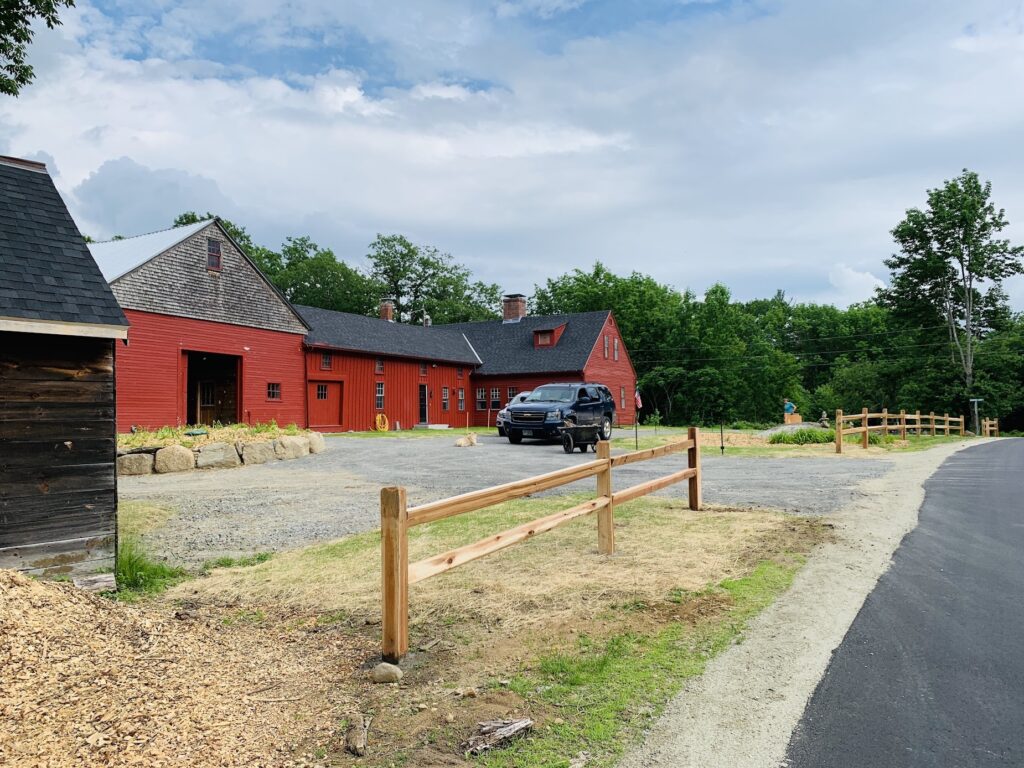
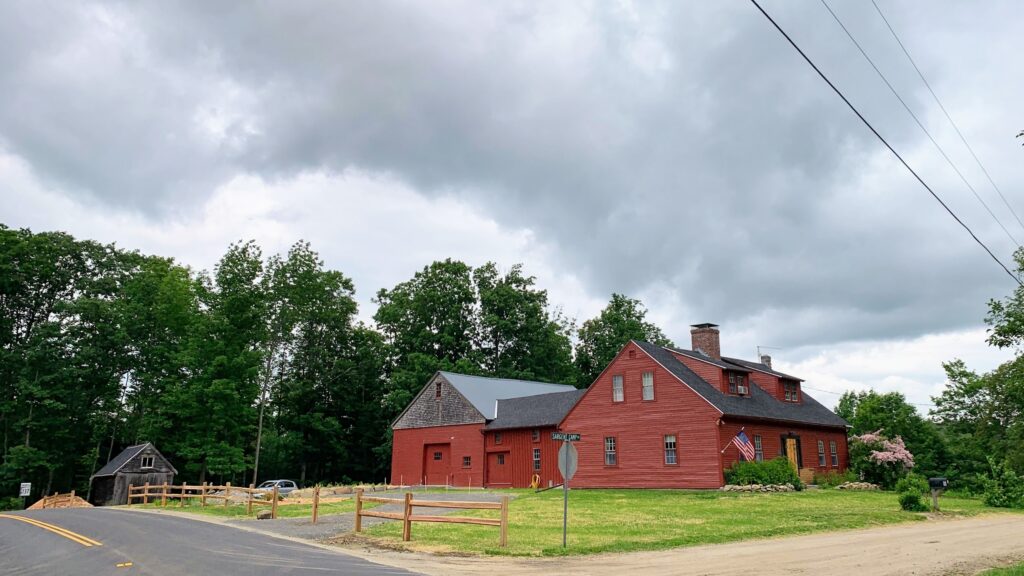
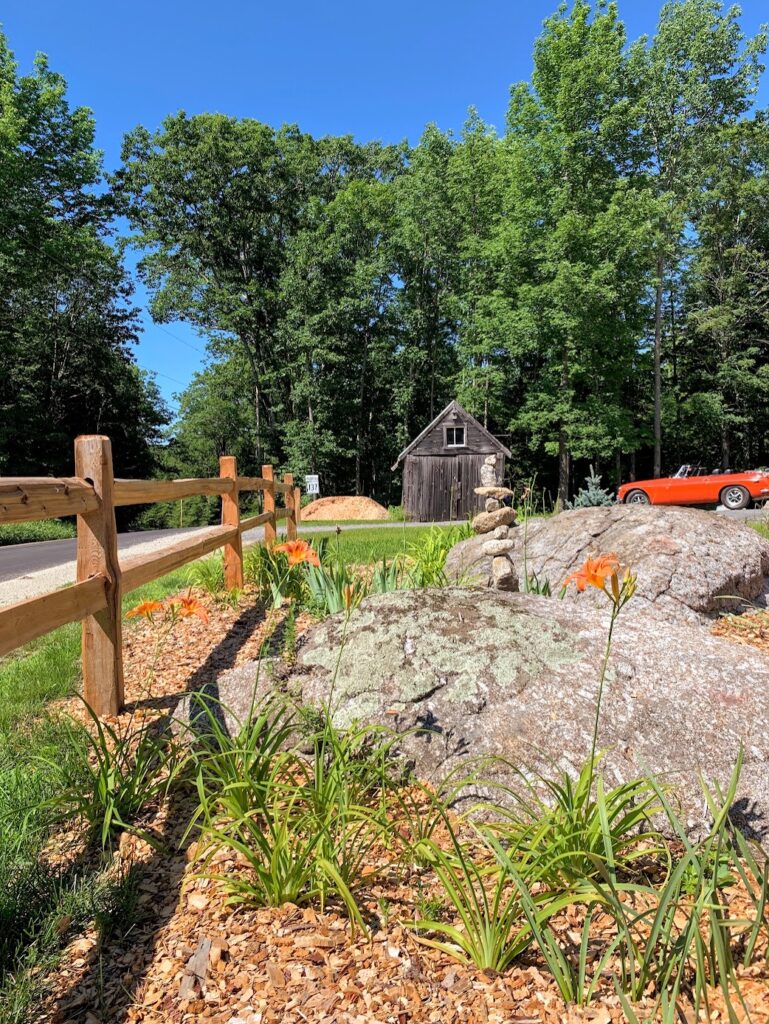
One of the projects we recently completed was the installation of a split rail fence along the driveway side. Being on a corner lot at an intersection where cell service is spotty at best, many people miss their turn, or are just lost, and use our circular drive as a turn-around. We don’t mind so much, except for the folks that drive around our cars parked in our own drive, and drive on the grass, or over the top of our septic tank! We considered how to go about keeping people from doing this- signs, fences, posts, etc, and finally settled on a fence along the road, with a post and chain blocking off the other entrance. We found a local fence contractor who would sell us the posts and rails (Western Red Cedar), and would also rent us his rock drill, just in case- this is the Granite State after all. We needed 14 posts, which meant 14 holes- and we hit granite 3 of the first 4 holes we dug. We were able to dig out the boulders for most, or move the post slightly to avoid them. We did end up needing to drill into one stone, and set a pipe into the hole. Then we drilled a hole up into the post to slide over the pipe which we set in the rock, and now it’s, well, solid as a rock! For the post in the driveway, we sunk a pipe into the driveway, and inserted a threaded rod into the post, so if we need to use the full drive, we can just lift the post out, and have nothing sticking up to drive over. We’re very happy with the result- it defines the yard, makes it look like a home, and politely keeps folks from driving across the yard without having a “Get off my lawn!” sign, lol.

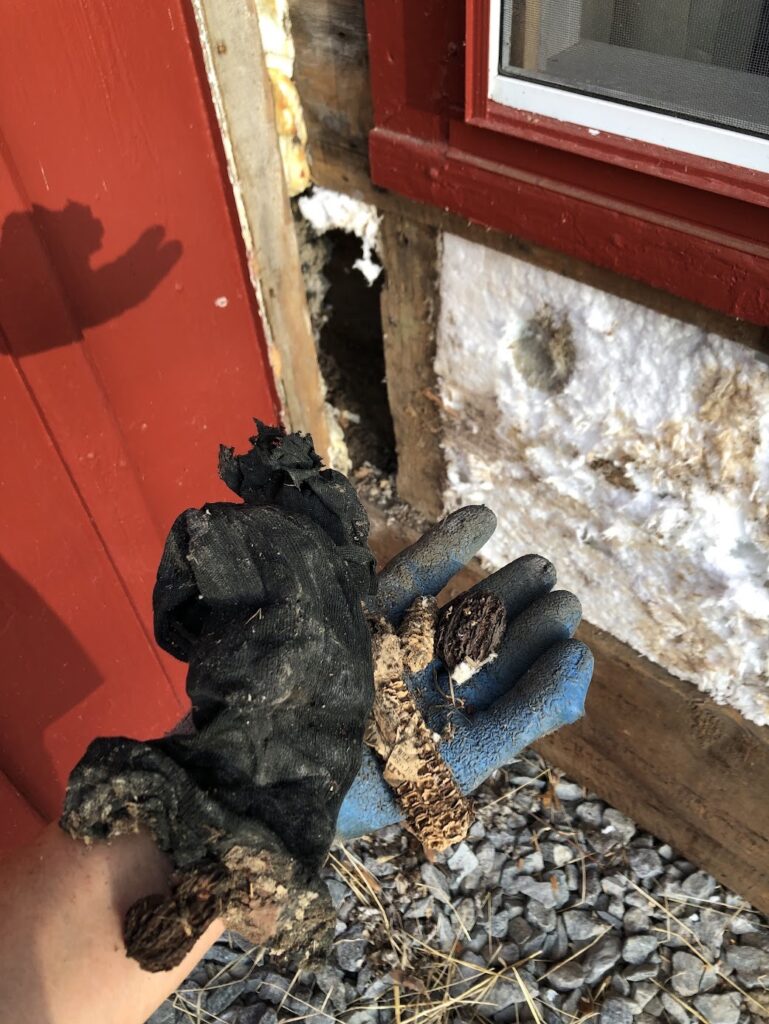
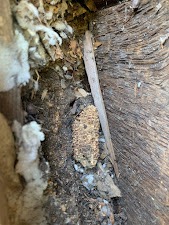
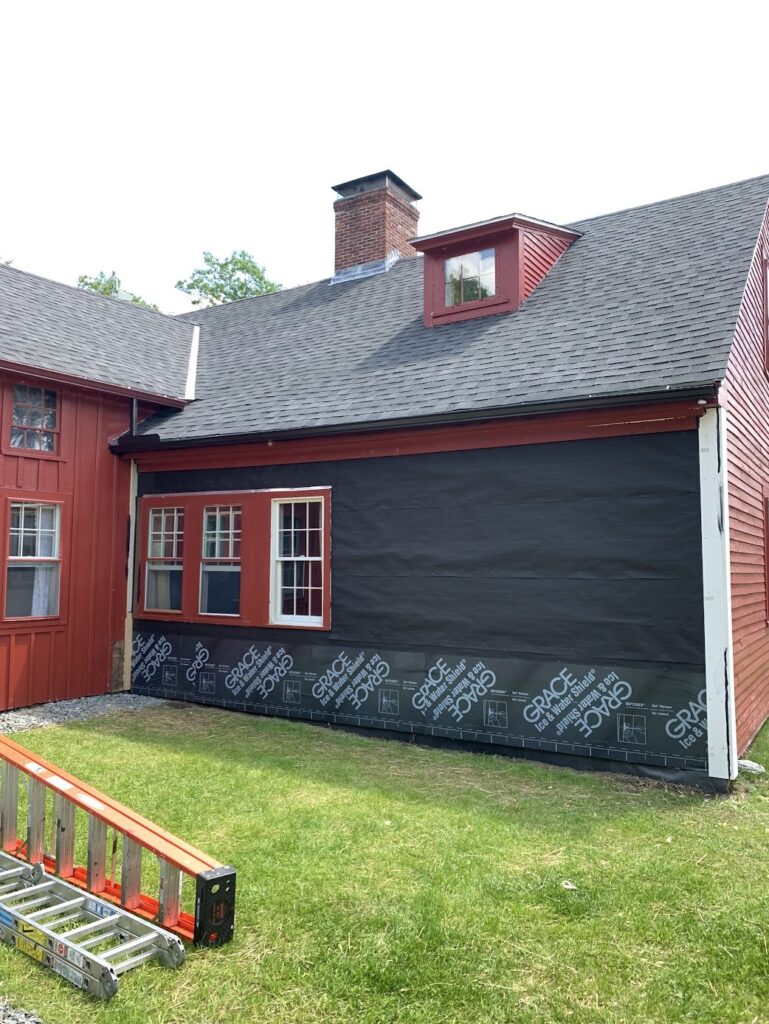
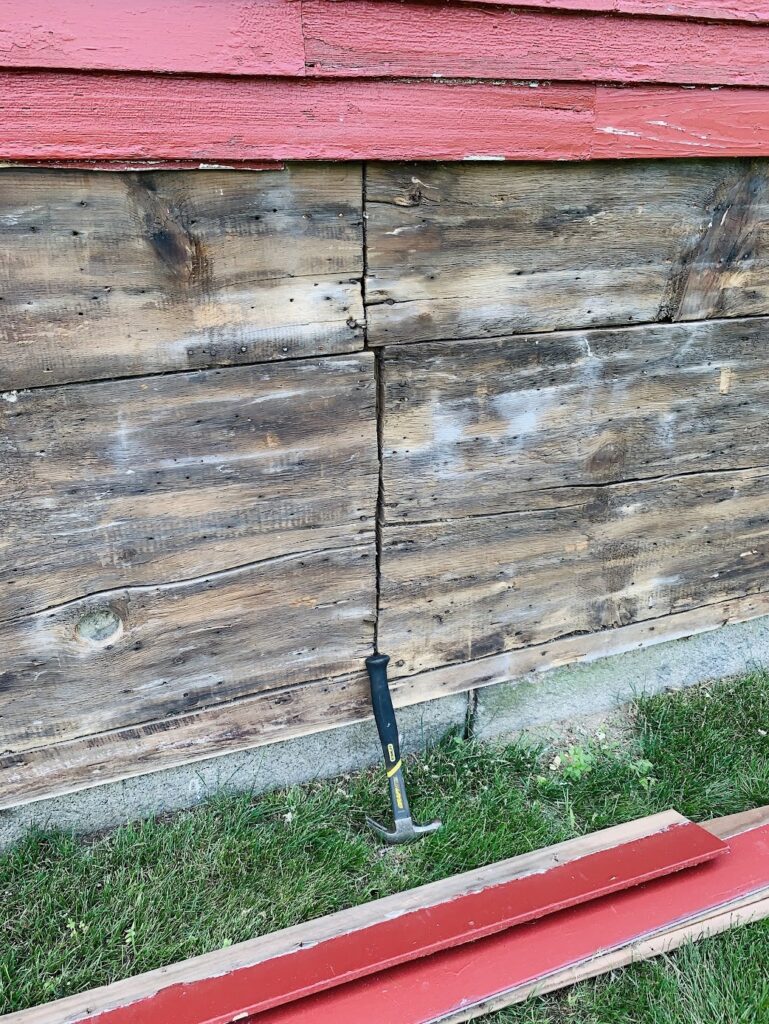
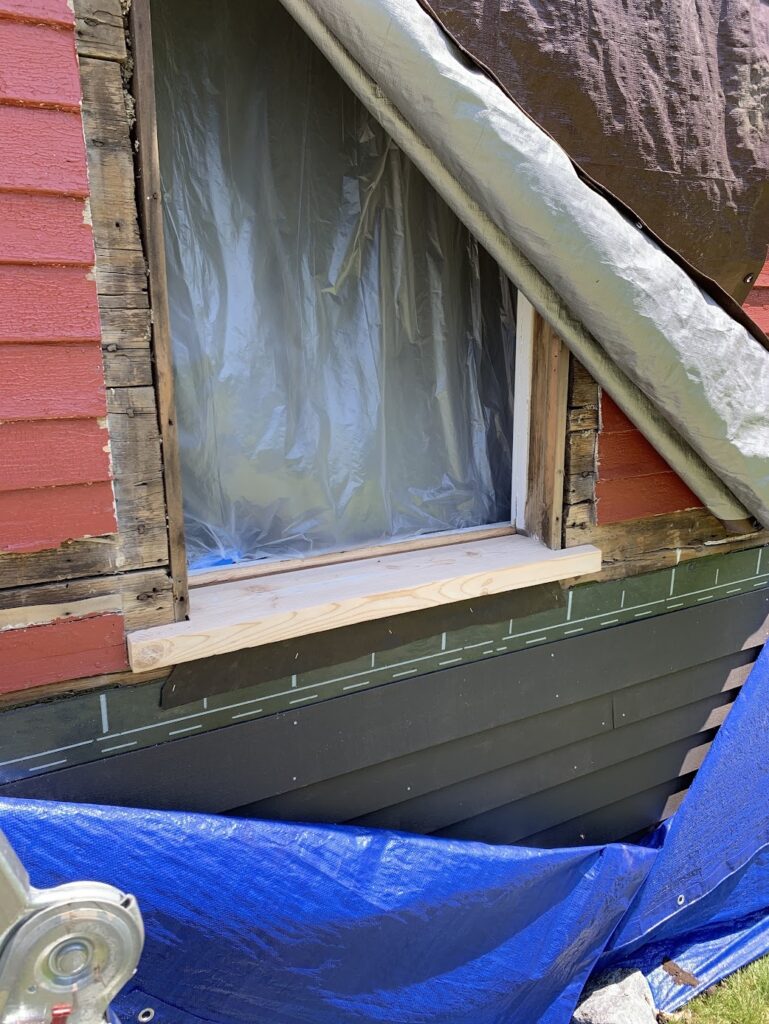
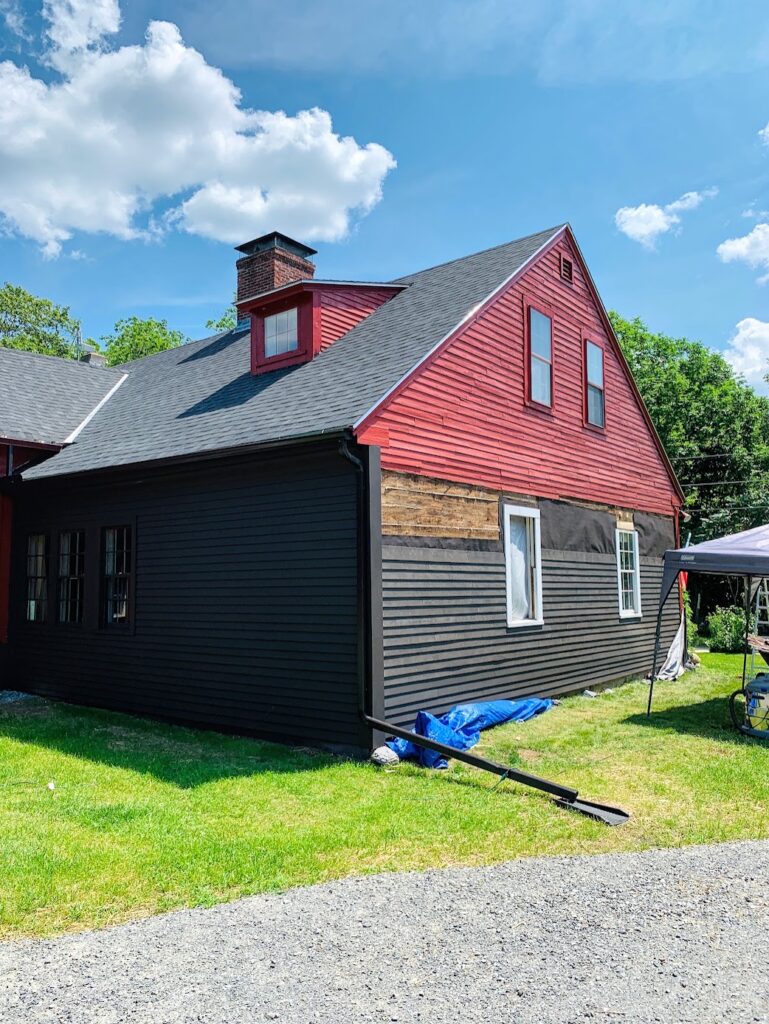
Another project we’ve begun was the long-awaited re-siding of the house. The old siding was rotted, broken, and leaking not only water, but wind, cold, and bugs. The clapboards were nailed directly to the sheathing- no wind or water barrier at all. Most of the siding was nailed with later, cut nails, so it could easily have been a hundred years old or more. Removing the old clapboards on the south wall along the hearth room revealed some rot in the lower sheathing. Removing the rotted lower sheathing revealed some rot in the sill. We had our timber framer stop by to look at it, as he’s working nearby, but he thought it was OK to keep. Now that we had exposed the wall cavities, this was also our opportunity to add some insulation where we could, as even though the house had blown-in cellulose insulation added at some point, it had settled in places, especially under the windows. When the cellulose insulation was installed, they also installed it right on top of the original insulation, which was mostly corn cobs. People often talk about opening the walls of an antique home to find all kinds of treasures- all we found was urine, rodent carcasses and an old dress sock-
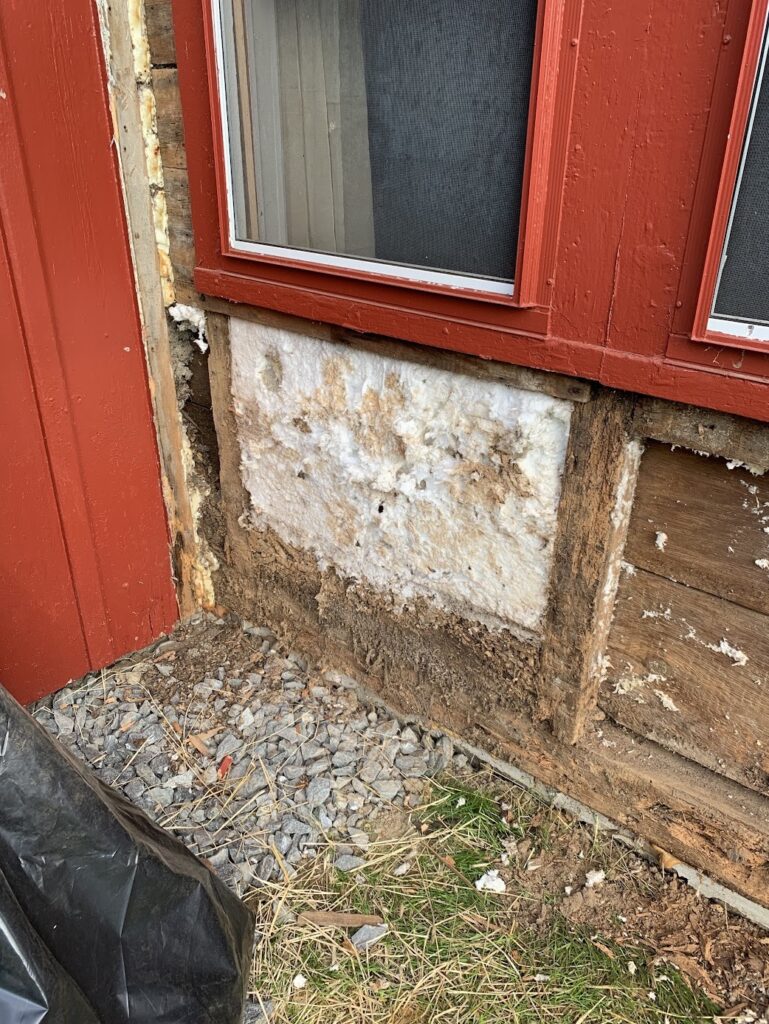

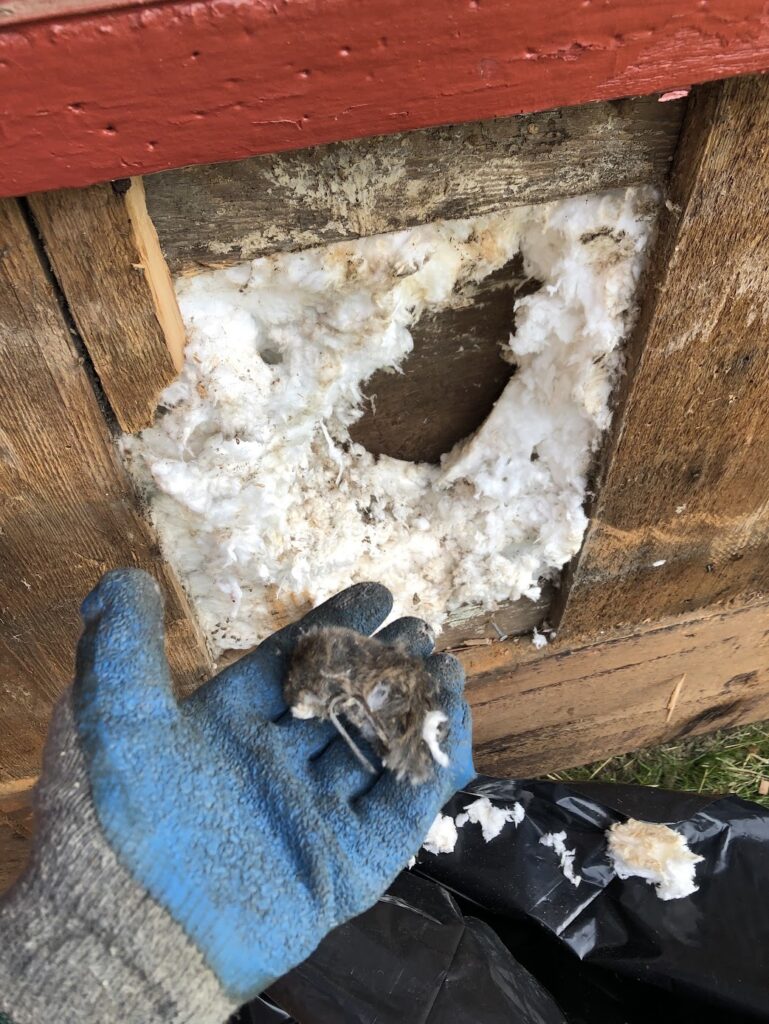
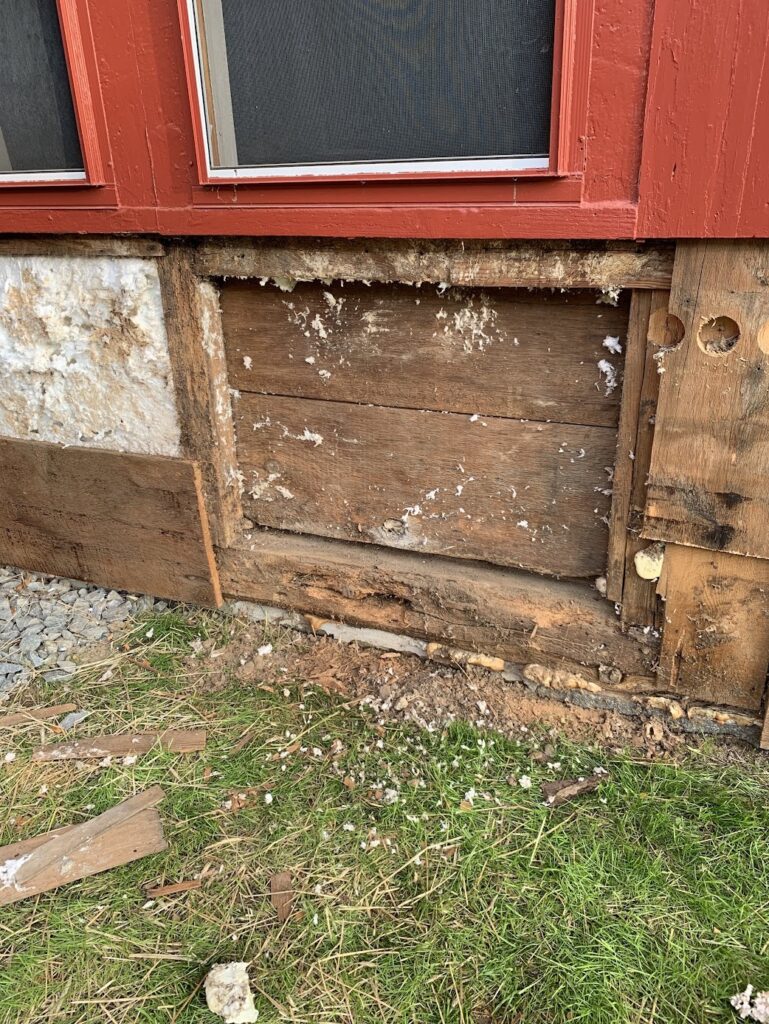
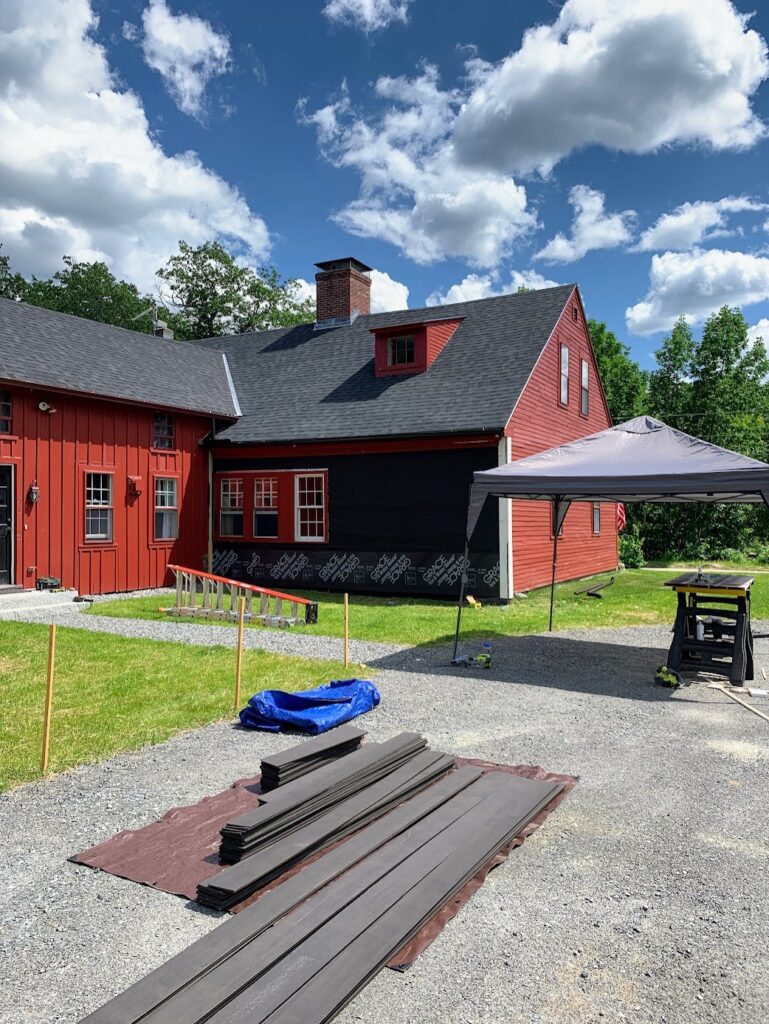
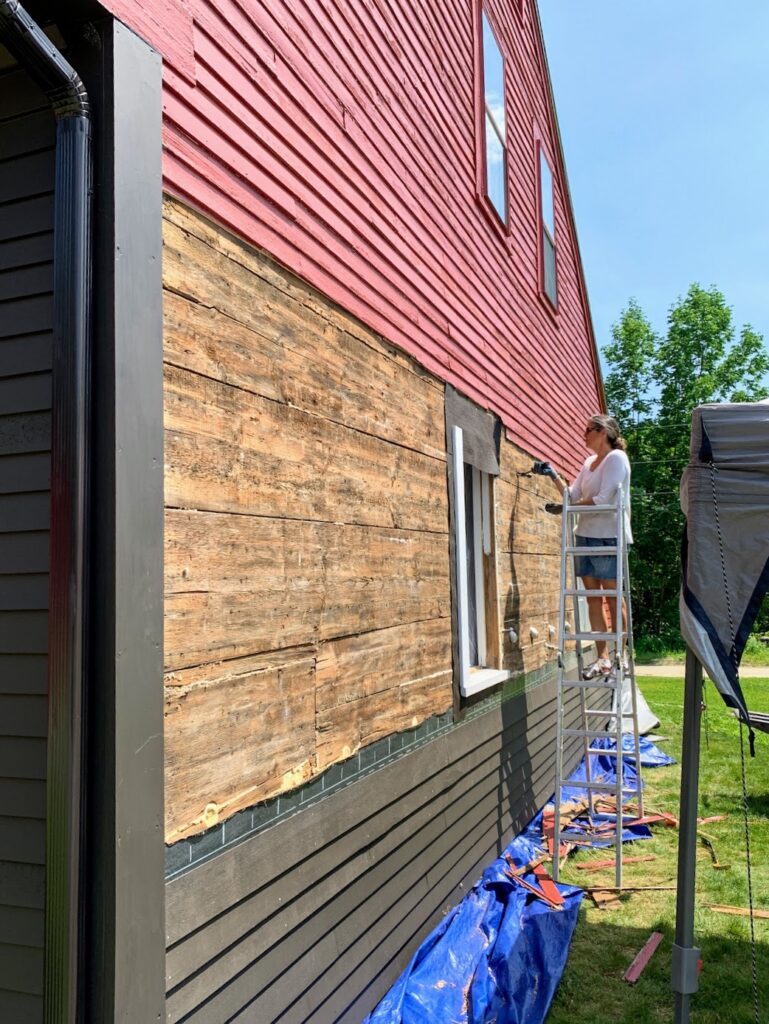
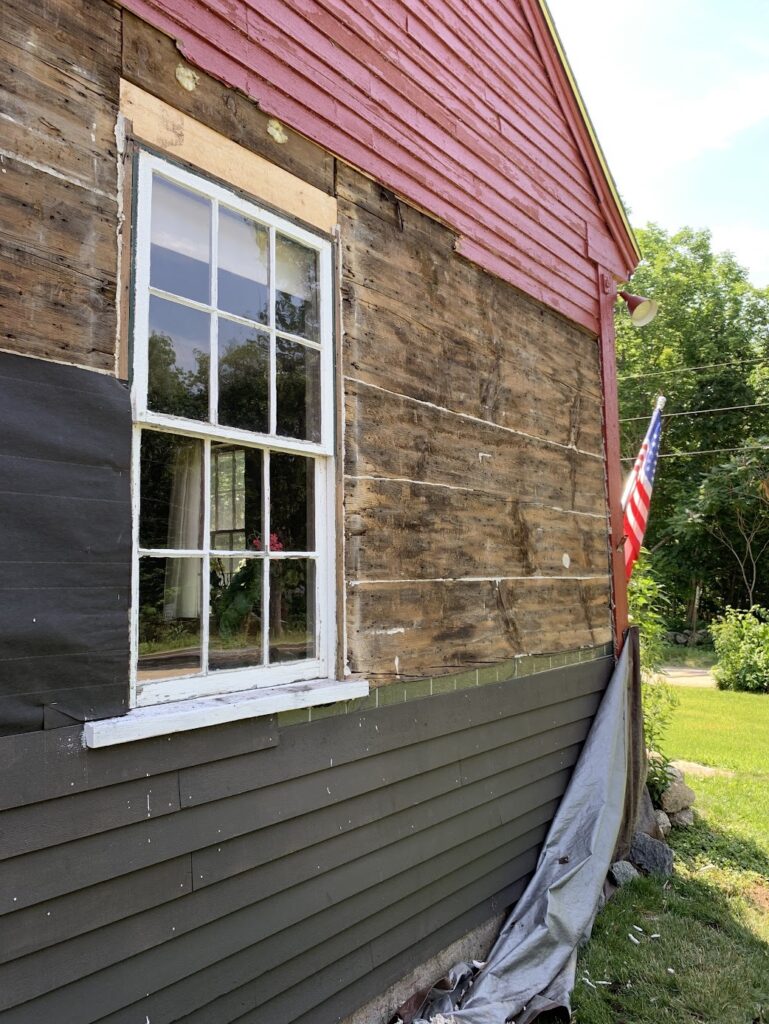
After cleaning out the wall cavities of as much as we could, we installed new mineral wool insulation (mice won’t burrow through it), then installed a rubber membrane over the sill, and extended it under the ground covering the granite foundation. This will prevent further rot due to snow and rain splash soaking up under the sheathing. Once we patched the sheathing, we sprayed expanding foam insulation into all the gaps and holes, then installed ice and water shield on the lower three feet, builder’s felt (tar paper) on the upper, and new trim boards along the vertical sides. Once we had the trim boards in place, we could begin nailing in the new pre-primed hemlock clapboards, which Jenny had already painted with one coat. We used a “random” reveal, as originally, they would have just eyeballed the reveal, plus it looks far better than having a uniform clapboard. Using a random reveal also hides how uneven, out-of-plumb, and out-of-true the house is. The old clapboards had reveals ranging from 3-1/2″ to 4-1/4″, so we settled on 3-1/2″, 3-3/4″, and 4 inches. We made wood blocks to use as spacers, then as we installed the new clapboards, we randomly grabbed one spacer or the other. Once we had all the clapboards installed, windows repaired, flashed and re-trimmed, we caulked the joints, then finished up with a final coat of paint.

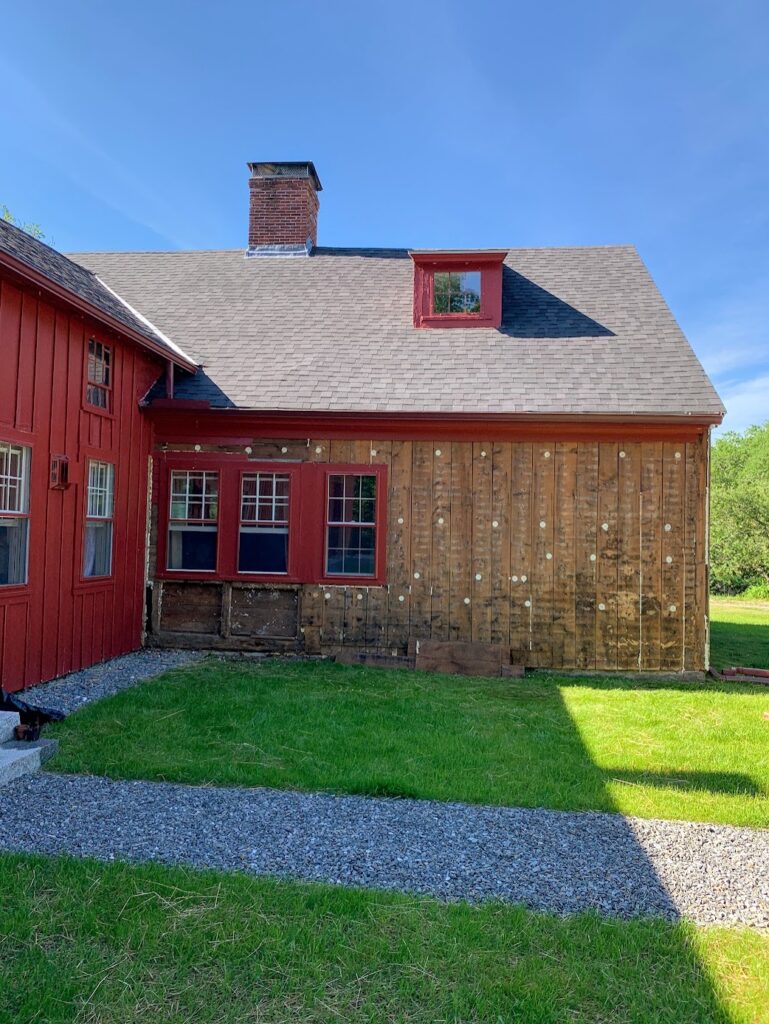
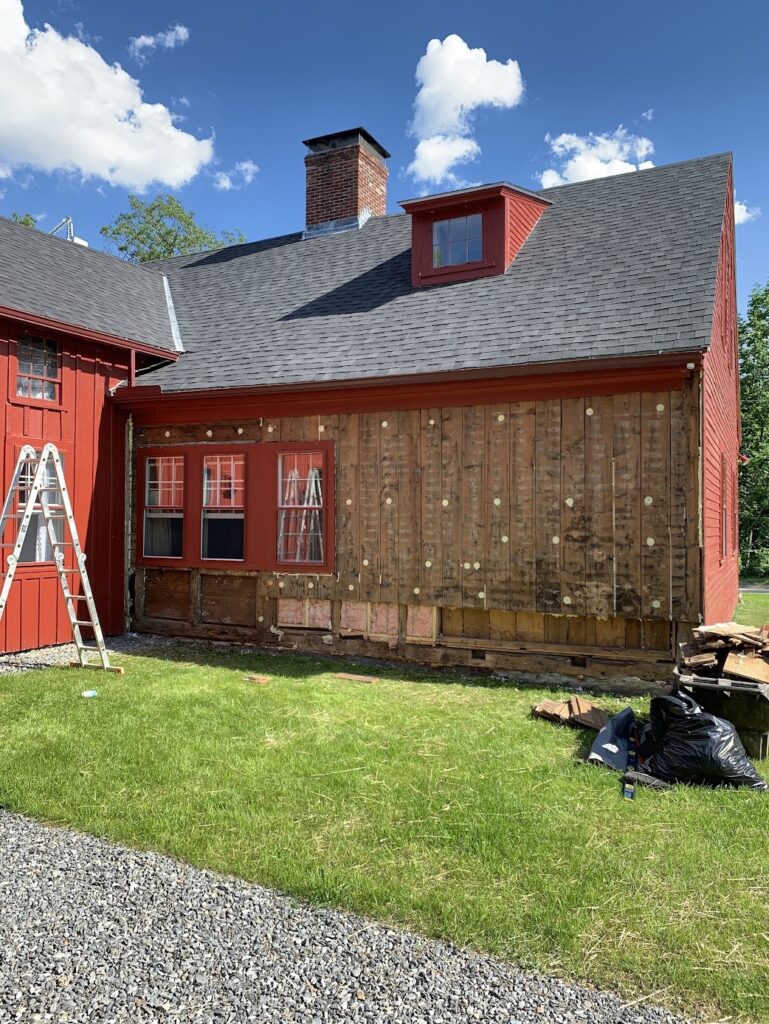

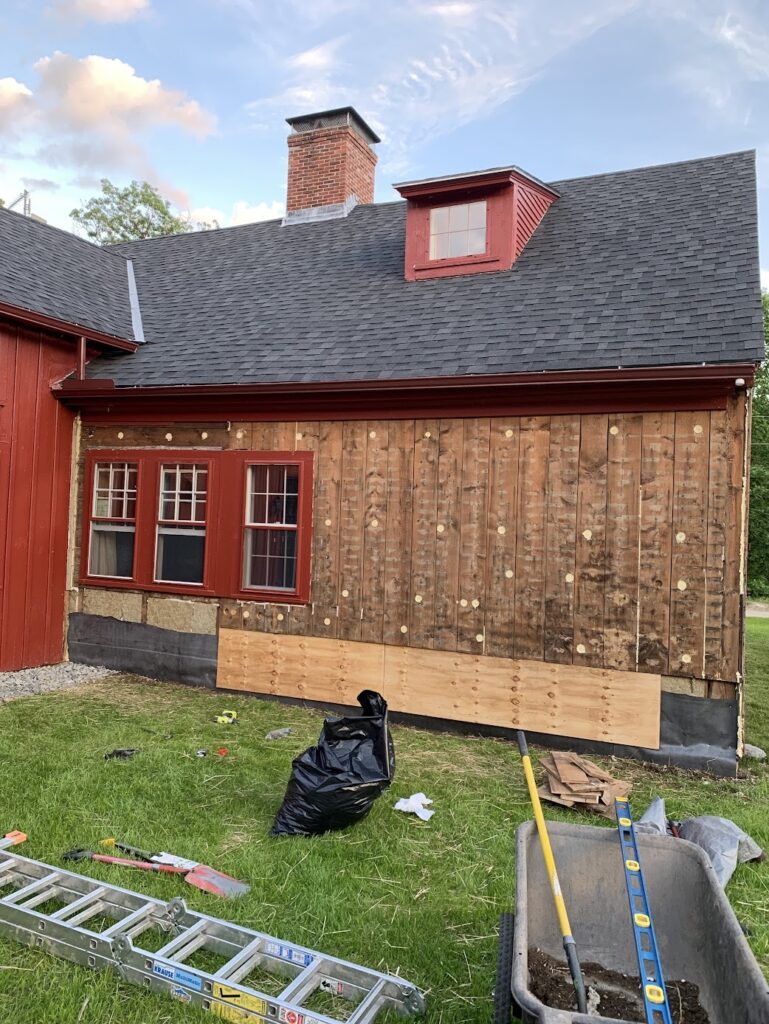
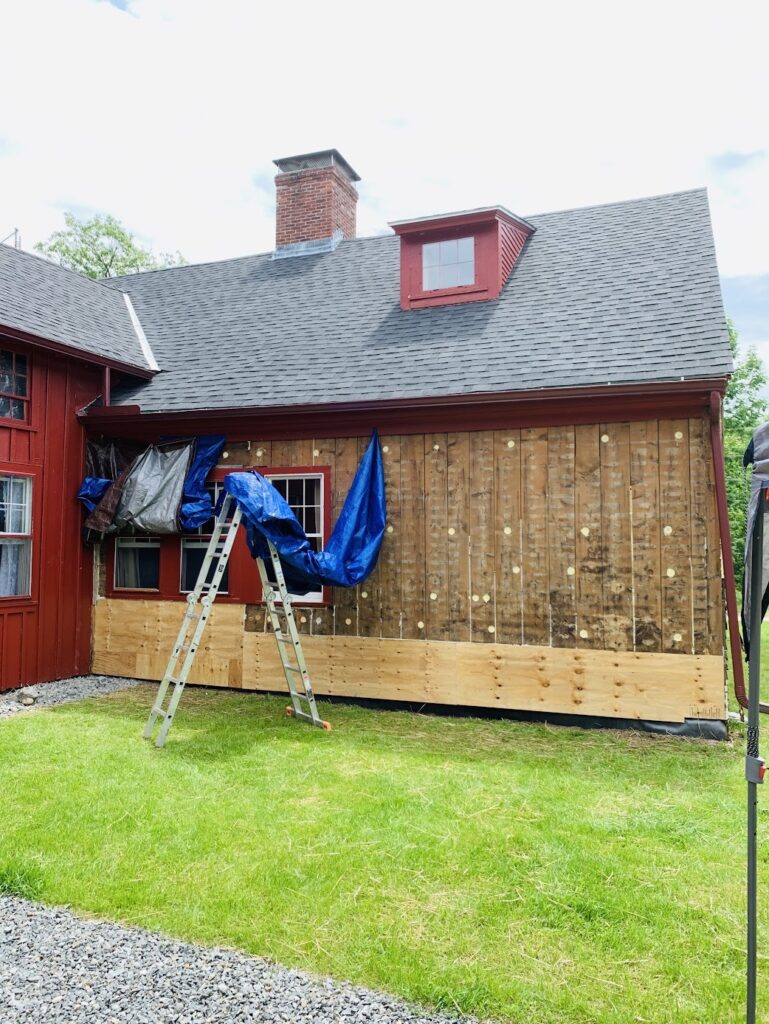


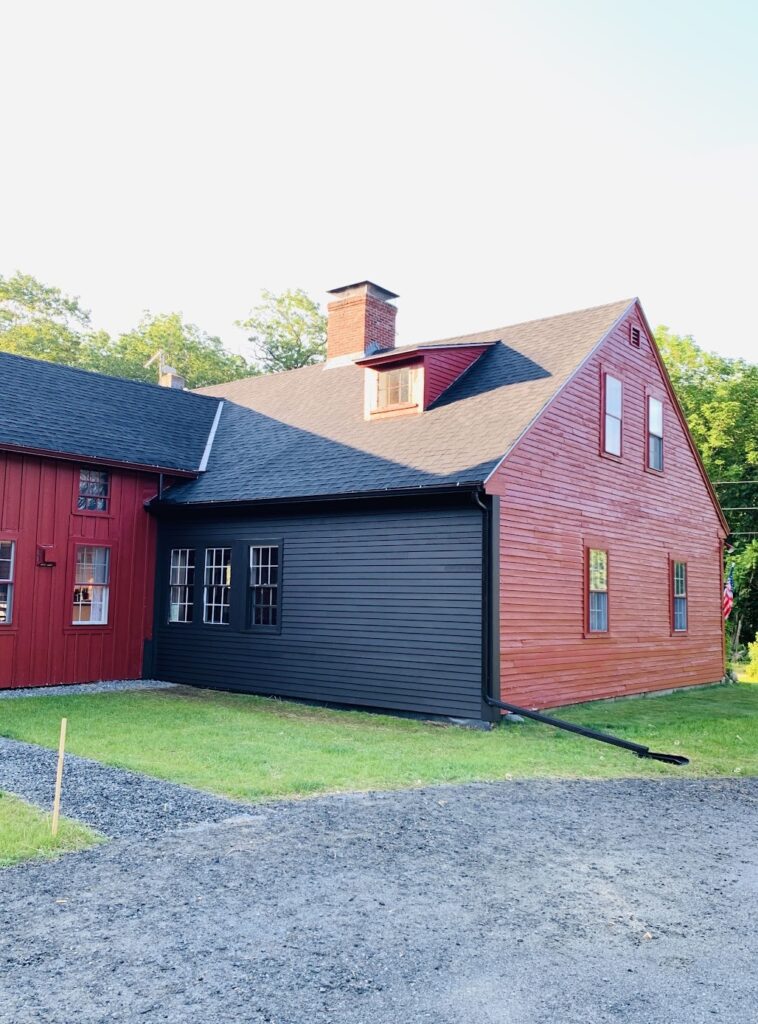
Moving around the corner to the gable end was much the same process, except that the original sheathing was in fantastic shape! We couldn’t believe the size of the sheathing boards- one was a full 25″ wide! We also found the reason the borning room window was always cold- the only thing between us and outside was the clapboard and the interior wall board! We did have to replace one window sill (so far) due to rot, and unfortunately, since everything on this house was hand-made, you can’t just run out and pick up a new one- you have to make it yourself. We (very fortunately) have a small supply of 2″ thick hemlock boards in our barn, so we milled a new sill, and moved on to start installing the new siding on the gable end.


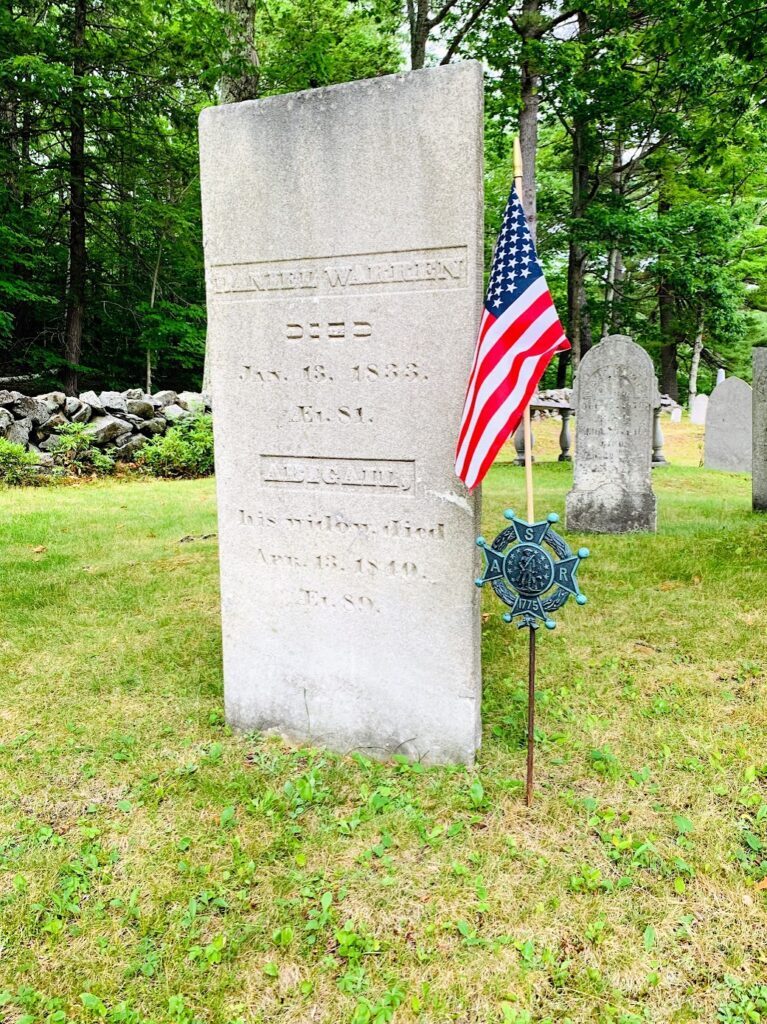
It was such a cool experience working on saving the home of an actual Patriot such as Daniel on July 4th- the full weight of which was very humbling, and was easily the coolest Independence Day we’ve ever had.

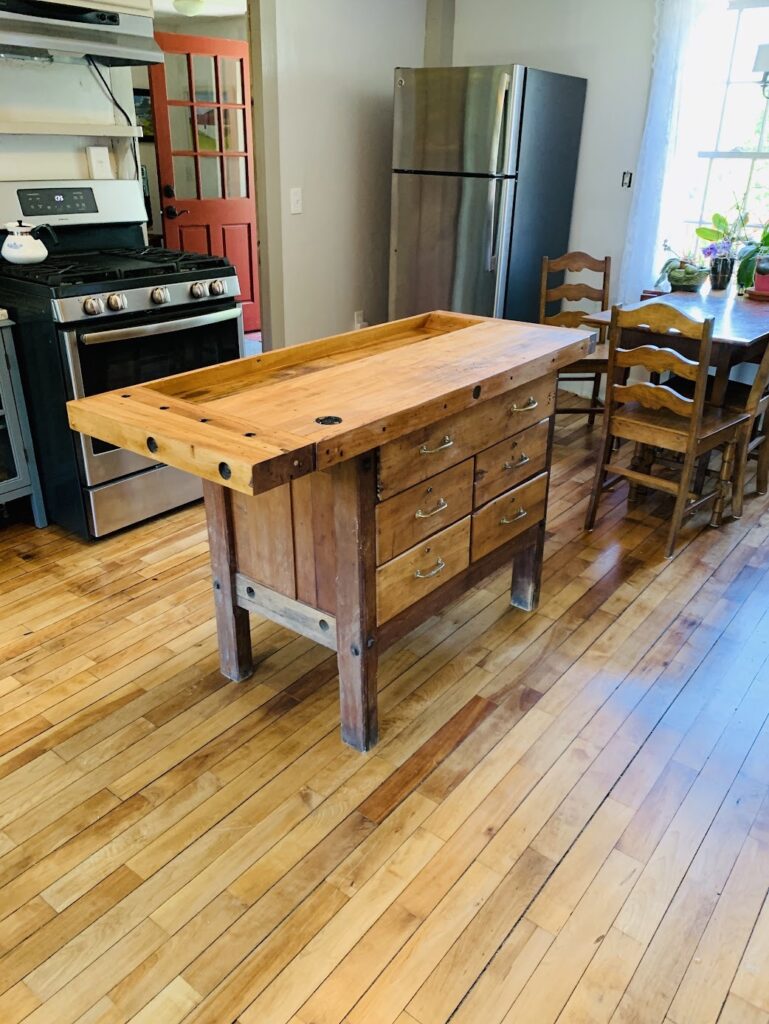
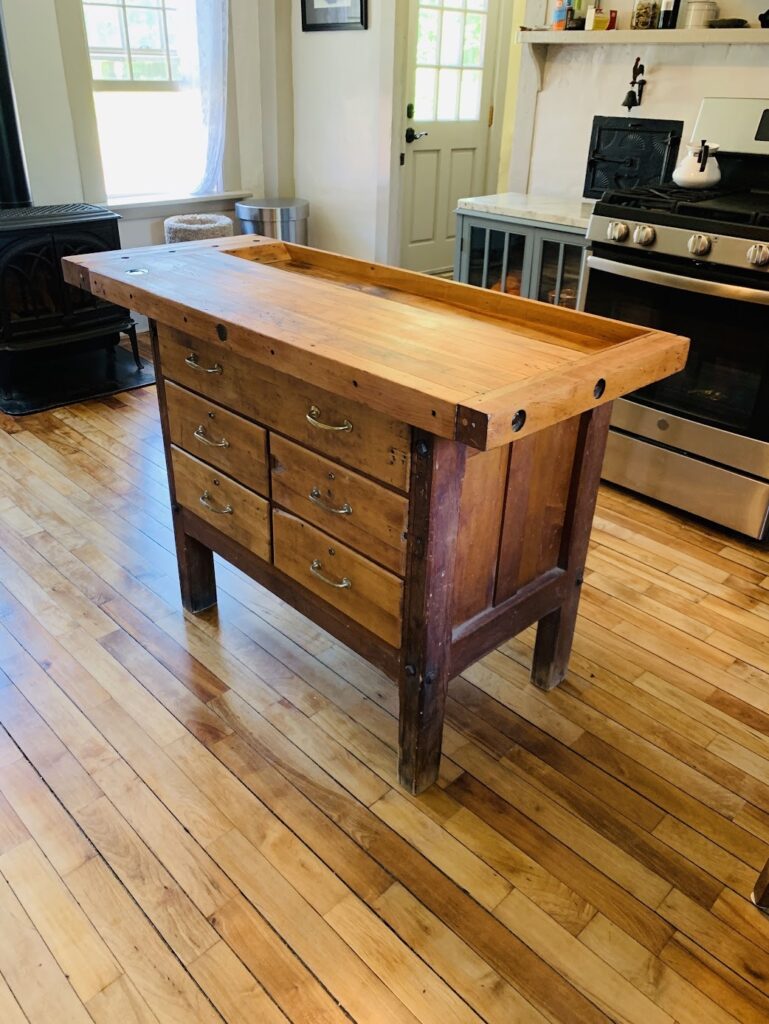
One of our latest Craigslist finds is this old workbench- made in the early 20th century by the G.R. Hand Screw Company- it makes a perfect kitchen island! We just lightly sanded the top, cleaned it, repaired the leg bottoms as they were split from wet floors, and applied food-safe butcher block wax.


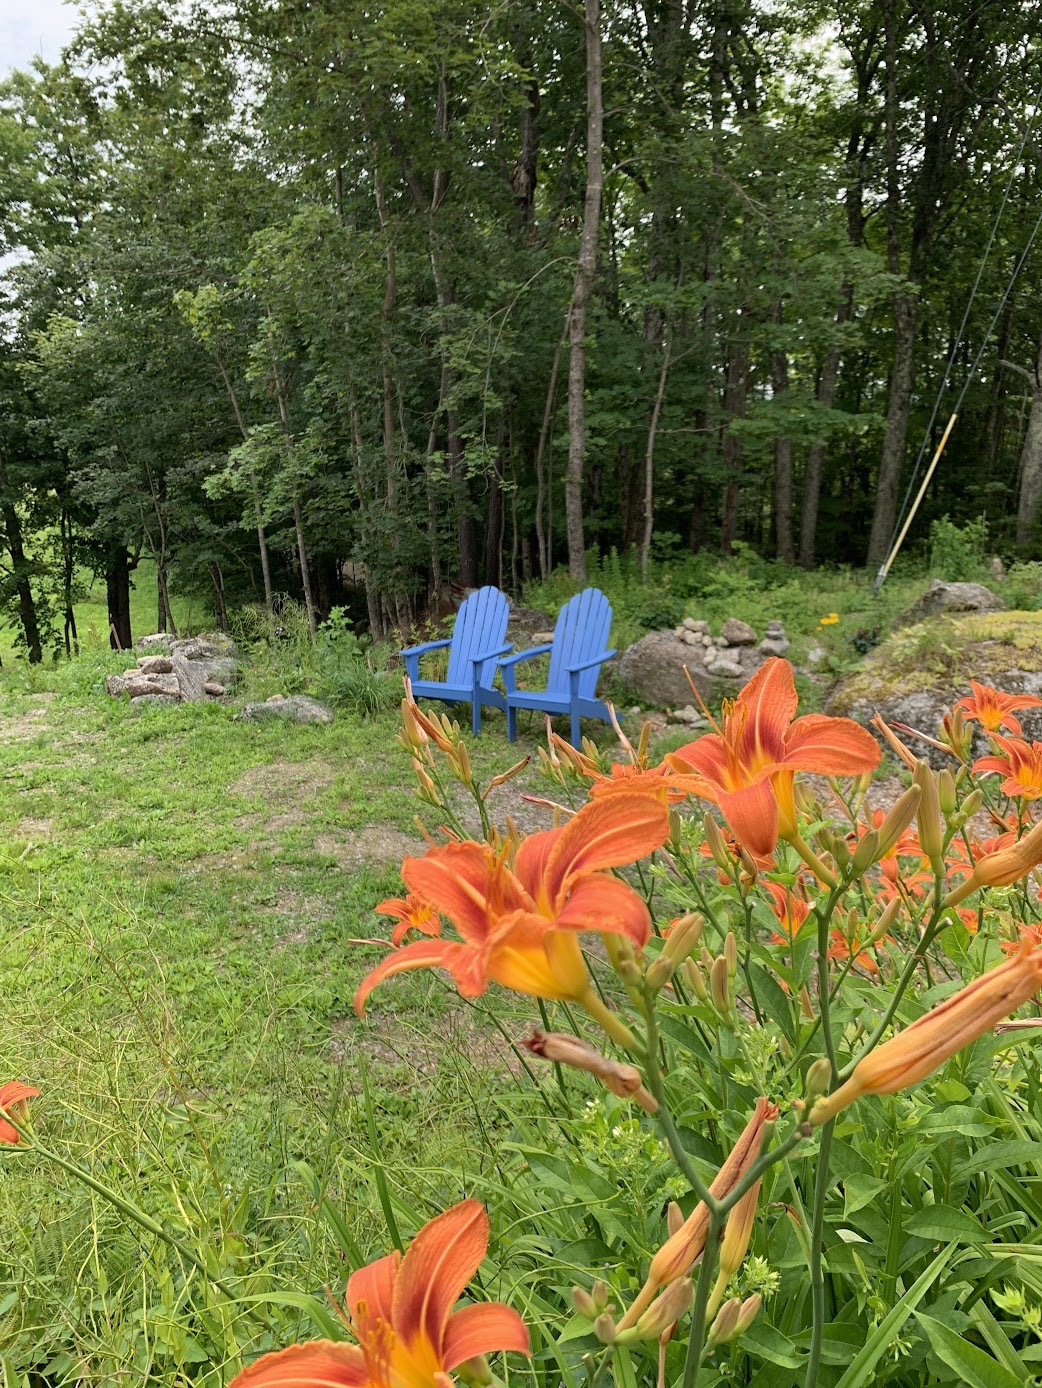
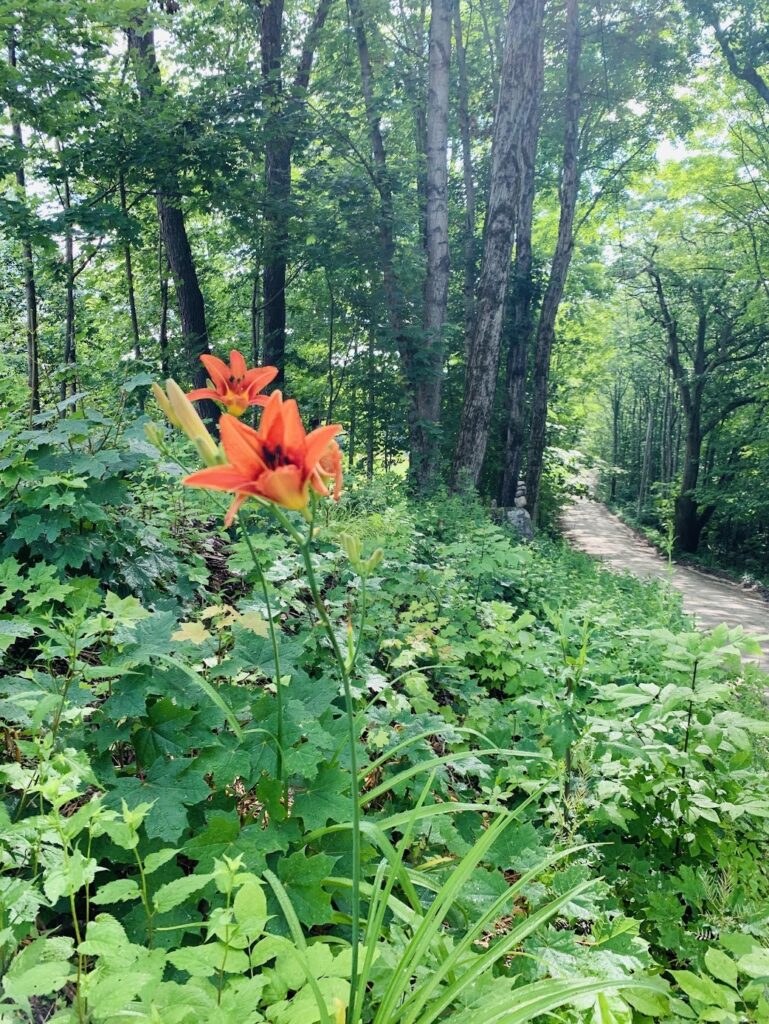
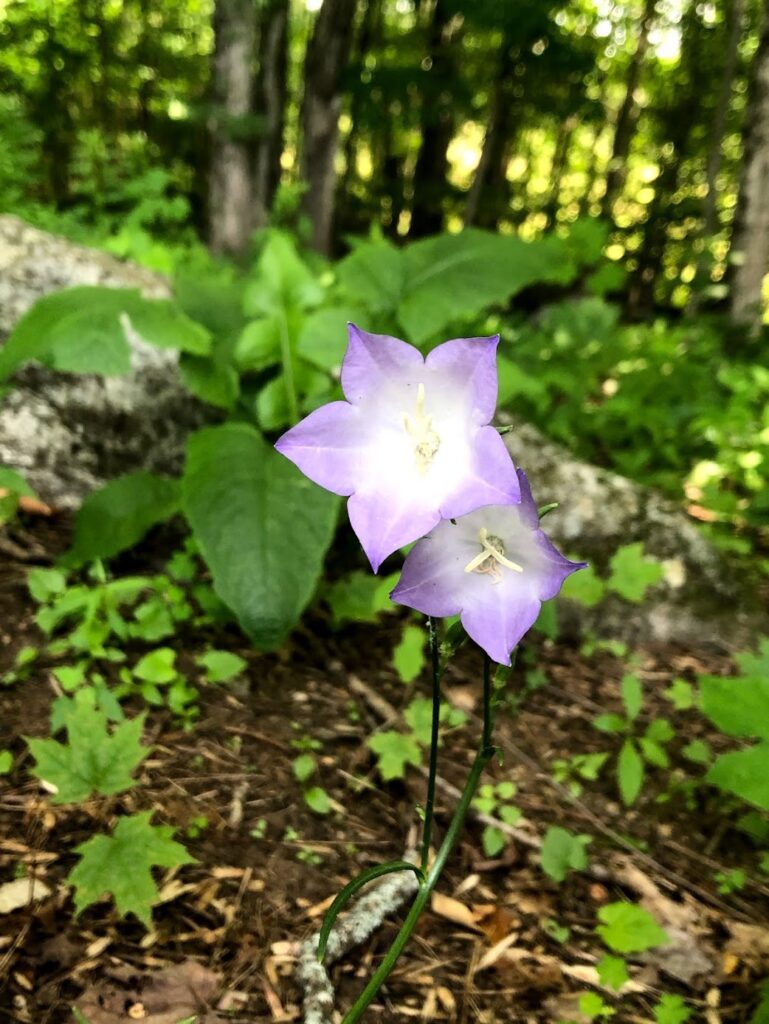
Since it is now fully summer, the spring flowers have faded, and the summer blooms are in full glory- lilies, foxglove, a random peony (one of the most beautiful we’ve ever seen), and many others are bringing color to the farm. The last image below is a shrub on the corner of the house that was in bloom when we arrived last year, and when it bloomed this year we were determined to figure out what it was- it is called a Beauty Bush. And it is very appropriately named.


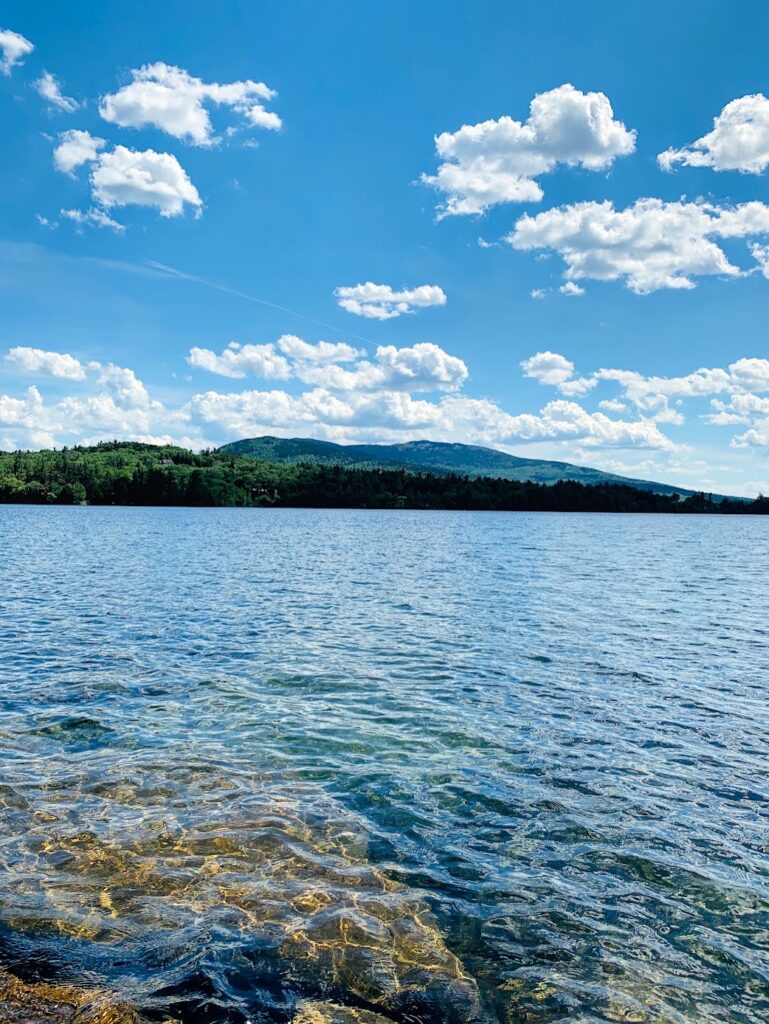
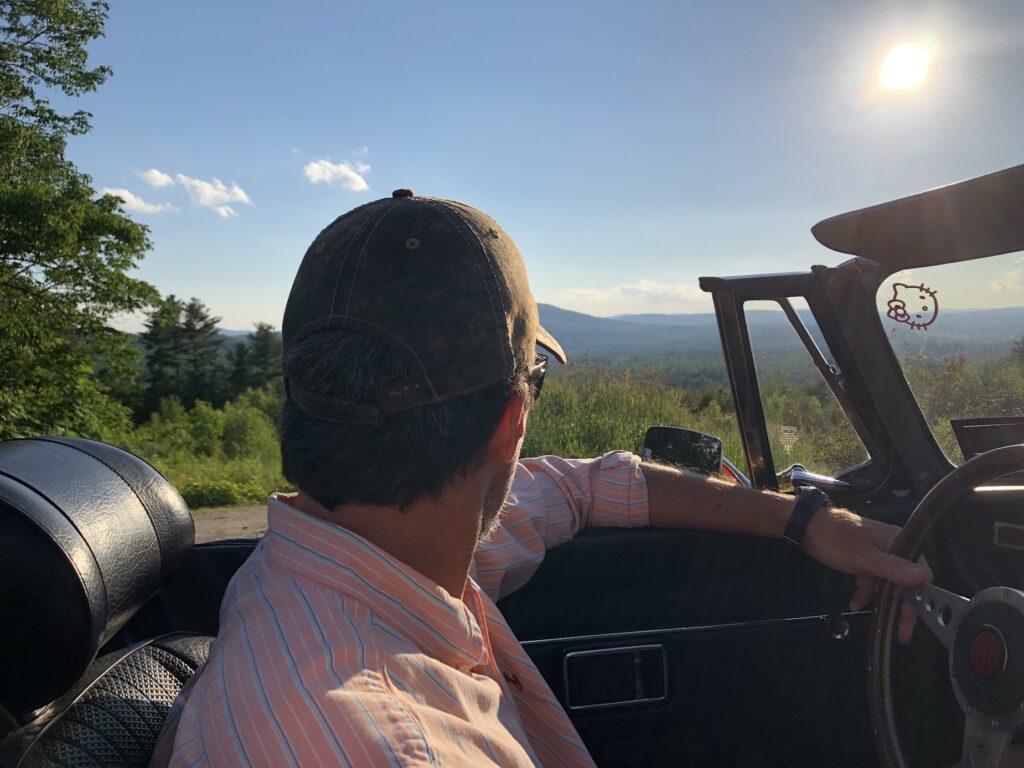
We’ve also been taking our old cars out for drives in the evenings, or taking the pup out for hikes- it’s just so beautiful here, and there’s still so much to explore. There are so many cute little towns, pubs, and glorious roads- the closest interstate is about an hour away!


So a year into this adventure, we have no regrets. At the end of each day, we’re exhausted and bruised, our fingers are smashed, and we’re having the time of our lives. We just cannot imagine doing anything else.
Thanks for coming along! Let us know if you have any questions, or would like more information about anything we’re doing here. And as always, feel free to share. Until next time- take care!
Leave a Reply